I hope you all had a wonderful Christmas! We did at our house. Christmas tends to be a busy time for preachers due to extra services, but there are some other areas of responsibility that lighten up at the same time, so both Christmas Eve and Christmas Day actually felt pretty relaxing here. Later today we are leaving to visit family for a week and we're really looking forward to that.
I'm rather behind with blogging. Things have been busy and while I've still managed to squeeze in the sewing time that I need, the blogging time didn't make the cut. I do find writing about my projects helpful for myself, so I'm going to try to get caught up relatively soon.
I've been thinking about aprons lately. I really like aprons. It's not unusual for me to wear one most of the day if I'm home. It seemed like it was time for me to have another one. I looked at a lot of patterns, but didn't find one that I really liked.
My personal apron preferences:
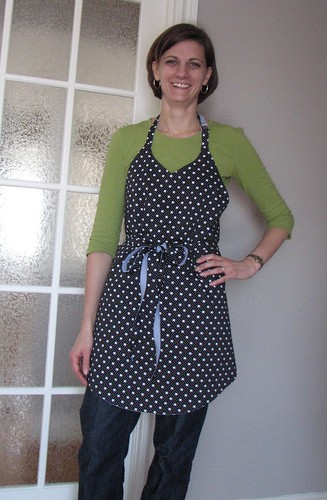
So, I decided to make my own pattern. It would be reversible, have a feminine neckline, a curved hem, and long ties. Here's the first version:
I used stretch woven fabrics for both sides of the apron - not because I thought that stretchiness would be a good quality to have in an apron, but because this was a muslin of sorts and I wasn't all that attached to these two fabrics.

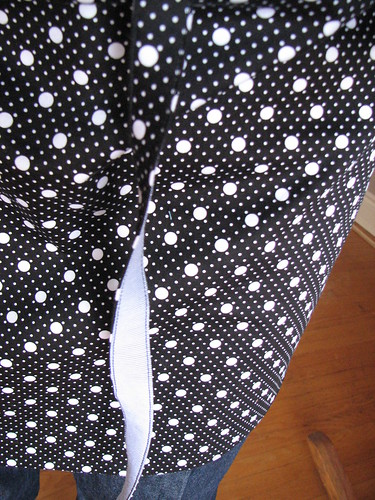
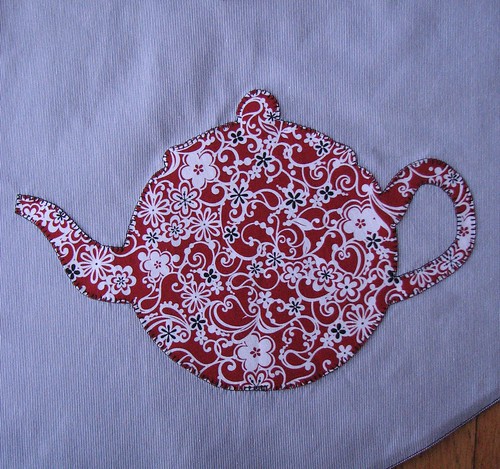
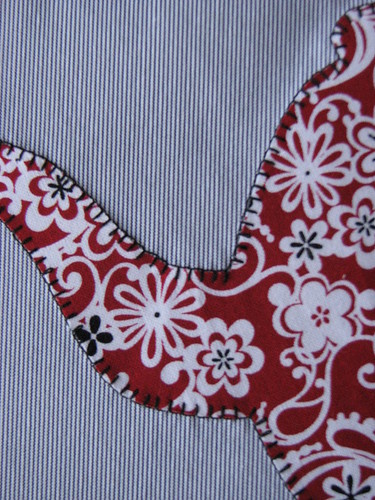
This is actually an accidental picture, but it shows the fabric well. I prefer this polka dot side. The other side is made from a black/white pinstripe shirting that reads as grey. Overall, it was very blah, so I added the tea pot appliqué at the lower edge.
After making and wearing this apron, I made some changes to the pattern...
I've already made it a second time - as a gift, so I can't write about it yet. But, soon...
I'm rather behind with blogging. Things have been busy and while I've still managed to squeeze in the sewing time that I need, the blogging time didn't make the cut. I do find writing about my projects helpful for myself, so I'm going to try to get caught up relatively soon.
I've been thinking about aprons lately. I really like aprons. It's not unusual for me to wear one most of the day if I'm home. It seemed like it was time for me to have another one. I looked at a lot of patterns, but didn't find one that I really liked.
My personal apron preferences:
- a full (with bib) apron
- some interest, but not a lot of ruffles or fussiness
- nothing that looks like a costume
- more feminine than this
- more interesting than this
- simpler to construct than this
So, I decided to make my own pattern. It would be reversible, have a feminine neckline, a curved hem, and long ties. Here's the first version:
This is my daughter's debut as a photographer. I was laughing at her taking the picture. Her running commentary about what part of me the "little box" on the screen was on was quite amusing. The fact that she was giggling and wiggling kept it moving around.
While the thought of having an additional available photographer is appealing, photos taken at an upward angle are not particularly flattering. Have to remember that...
This is actually an accidental picture, but it shows the fabric well. I prefer this polka dot side. The other side is made from a black/white pinstripe shirting that reads as grey. Overall, it was very blah, so I added the tea pot appliqué at the lower edge.
After making and wearing this apron, I made some changes to the pattern...
- I don't like how short the apron is in the back, so for the next version I lengthened it a bit, keeping the center front the same. It changed the curve a little, but from the front it still looks the same.
- The ties are really long. Too long. Ideally, they would be long enough to give me the option to tie them in front. These pretty much require being tied in front.
- I like the neckline, but felt like the neck strap looked too narrow, so I made it a bit wider.
I've already made it a second time - as a gift, so I can't write about it yet. But, soon...
Very nice apron. I like your black and white polka-dotted fabric and your teapot applique. Merry Christmas!
ReplyDeleteGreat apron pattern! I love the teapot applique (I am a big tea drinker). I liked the length of the back. Also, I agree with your thought that the neck straps could be wider. Look forward to seeing more!
ReplyDeleteGreat looking apron! I like the fact that it is reversible and the neckline is really nice. The tea pot is a fun touch too :)
ReplyDeleteGood for your for coming up with your own design. I like the simplicity in it too! Cute teapot. Have the best of times on your family visit!
ReplyDelete