Thanks for the compliments on the tote bags. It's good to know that many of you liked them - hopefully people buy them!
When I dropped off the tote bags, I also dropped off three purses.
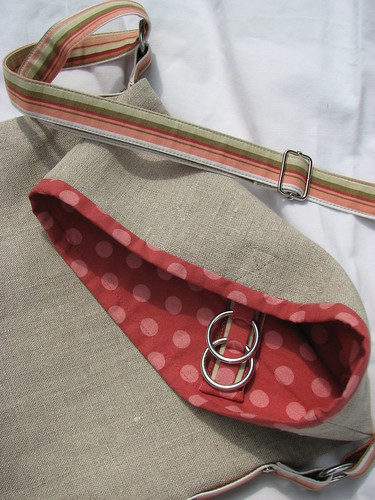
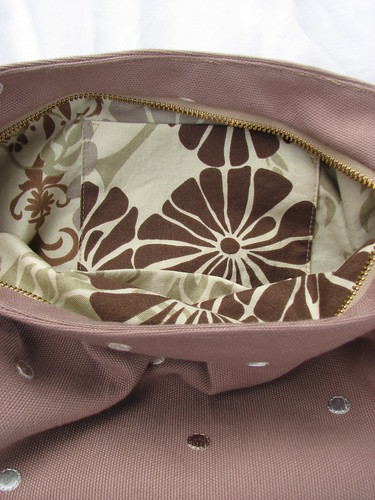
The first is my own "design" - a combination of a purse I saw my sister use awhile ago and the one that I currently carry. It has a long adjustable strap and I pictured it worn across the body, but it could go over one shoulder, too. The top folds over and doesn't have any fastener.
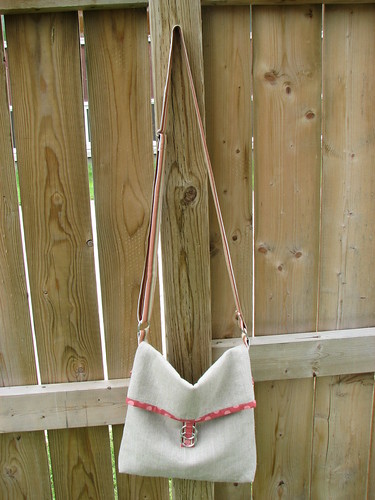
I wanted the sides of the bag to be straight, not angled toward the bottom (like the tote bags), but wanted boxed corners, so I followed the same tutorial as I did for these little pouches, just with different dimensions. It worked well, but since I kept the bag pretty flat/narrow (from front to back) any angle from boxing the corners the regular way probably wouldn't have been noticeable.
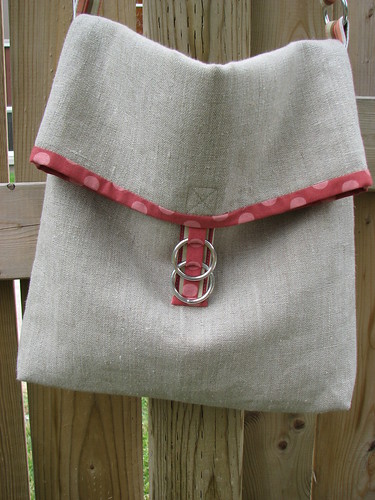
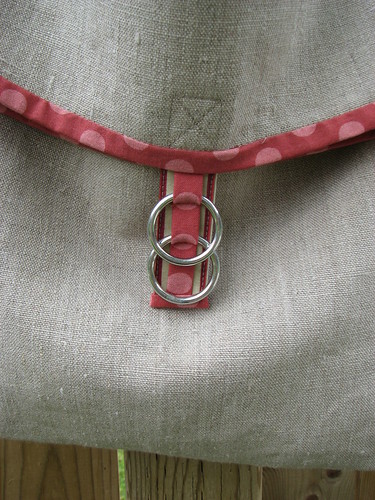
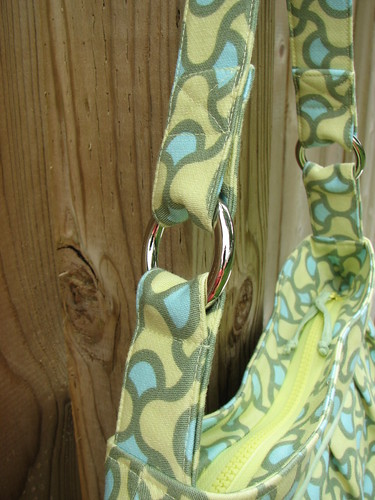
The tab with rings is primarily decorative, but works as something to grab to easily open the bag, too. The rings are "harness rings" from the hardware store. They are zinc-plated and come in many sizes. A warning on the tag reads, "DO NOT USE for overhead lifting of a load, support of human weight, athletic or playground equipment." I think handbag use is okay.
The strap is adjustable (more harness rings) and is attached to the bag with rivets. I bound the end of the strap to cover the raw edges.
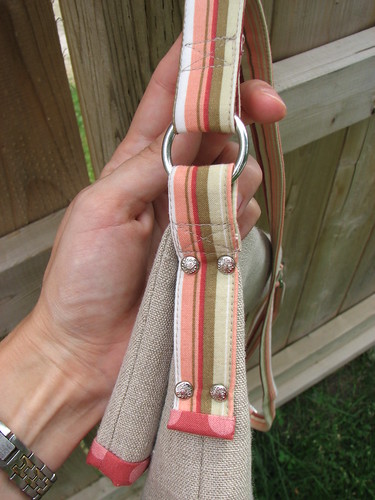
The lining is cut longer than the outer bag so that it folds over and forms a sort of binding. I stitched in the ditch from the right side to keep it in place. Here you can see the slider on the strap for adjustments. There is a single pocket on the inside of the bag, but I couldn't get a good picture of it.
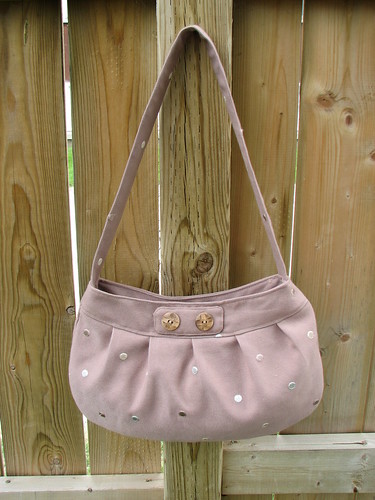
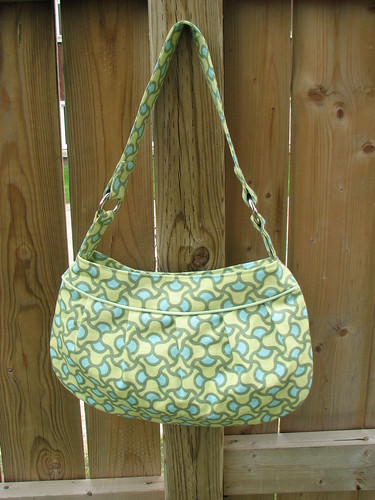
For the other two purses, I used the Buttercup Bag pattern from Made by Rae. I purchased the pattern with limited commercial license. Her tutorial/pattern is free, but the pattern comes with an enlarged version and it gives you the right to sell it. Both of these are the enlarged version.
I used the same fabric as I did for this bag. It feels a little boring here to me, but maybe someone will like it.
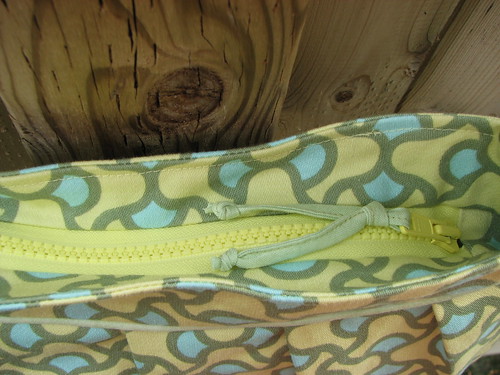
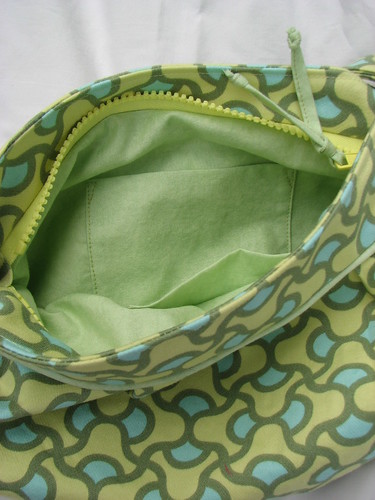
The pattern includes instructions for adding a magnetic snap as a closure, but M really wanted purses that closed completely, so I added a recessed zipper. I'm happy with how it turned out, but it took me forever to figure out how to do this. Even with two tutorials helping me, I thought and thought and thought about it. Finally, it just clicked. I'm not sure why this was such a puzzle for me. The tutorials I used are here and here. The second one was much more helpful for me than the first, but I appreciated the modified pattern picture in the first, since it was for the exact bag I was making.
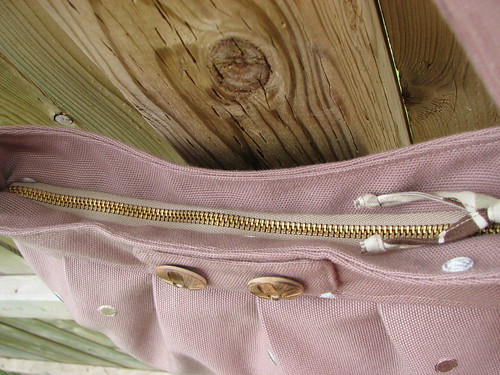
The zipper pull is made from the same fabric as the lining.
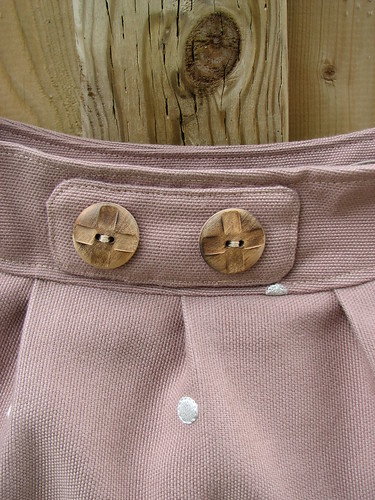
The button tab on the front is purely decorative.
There are two interior pockets - one on each side. The lining is a quilting cotton.
Initially, I was going to make the third bag a different style, but by the time I was getting to the end of this order, I really wanted to be done and the style I had in mind wasn't all that different from the Buttercup Bag. While another style would have been nice for display purposes, I decided against it for time purposes.
So, the second Buttercup Bag is just like the first.
If the other fabric was a little boring, this one is a little crazy. :)
I chose to add piping (the same fabric as the lining) and leave off the button tab.
When I dropped off the tote bags, I also dropped off three purses.
The first is my own "design" - a combination of a purse I saw my sister use awhile ago and the one that I currently carry. It has a long adjustable strap and I pictured it worn across the body, but it could go over one shoulder, too. The top folds over and doesn't have any fastener.
For the other two purses, I used the Buttercup Bag pattern from Made by Rae. I purchased the pattern with limited commercial license. Her tutorial/pattern is free, but the pattern comes with an enlarged version and it gives you the right to sell it. Both of these are the enlarged version.
The pattern includes instructions for adding a magnetic snap as a closure, but M really wanted purses that closed completely, so I added a recessed zipper. I'm happy with how it turned out, but it took me forever to figure out how to do this. Even with two tutorials helping me, I thought and thought and thought about it. Finally, it just clicked. I'm not sure why this was such a puzzle for me. The tutorials I used are here and here. The second one was much more helpful for me than the first, but I appreciated the modified pattern picture in the first, since it was for the exact bag I was making.
The button tab on the front is purely decorative.
So, the second Buttercup Bag is just like the first.
If the other fabric was a little boring, this one is a little crazy. :)
I chose to add piping (the same fabric as the lining) and leave off the button tab.
I took these rings off of a purse that I wasn't using anymore. They're considerably heavier than the harness rings mentioned above, but a good size and weight for this bag.
Okay, bring on the customers!
Hey, I like the last purse! The lining looks nice. I hope you're happy with your fabric choices.
ReplyDeleteWOW you are on a roll and all your versions are all so very nice and very professionally made. I like the hardware you are using.
ReplyDeleteThank you for including all the tutorials.