
Final Summer Sewing

This shirt was the last of my summer sewing. Like most summers, there are many things left on my "want-to-make" list, but summer is a short season here and consistently my least productive time of year for sewing. After this shirt, I did make a few back to school things for my kids, so fall sewing has already begun. 

I’m really happy with this shirt, but nothing was surprising about it. I knew I liked the fabric and used my tried-and-true shirt pattern.

IMG_9769

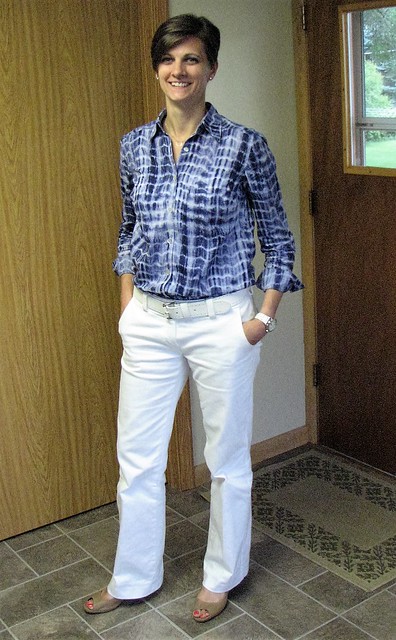
This fabric has been in my stash for a few years. I bought it on deep discount at an end of season sale. I like that it has the tie-dye feel without being overly hippie-ish. It is a lightweight cotton (lawn, perhaps?) with a stable weave and soft feel. It was lovely to work with. Unlike the fabric for this shirt, which felt a little bulky, this  worked wonderfully for the collar, plackets, etc.

IMG_9760

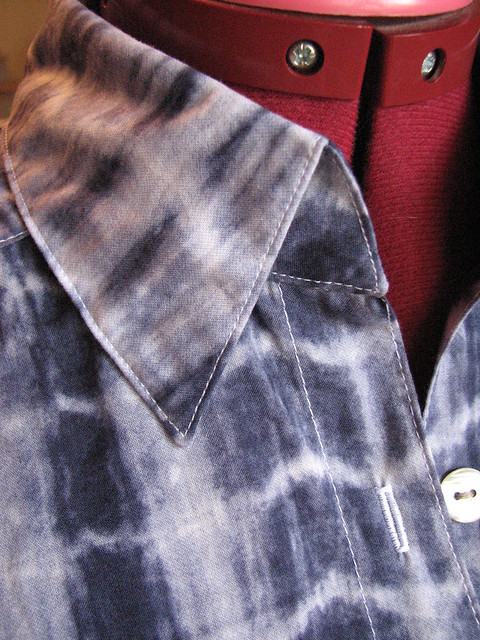
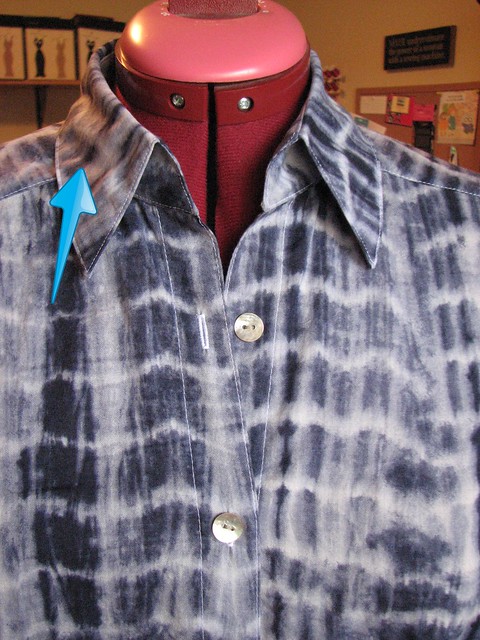
I continue to tweak my collar making methods. For this one I combined Tasia’s tutorial (bleached muslin, glue basting) with Pam’s point turning tip. For finishing the collar band, I use Gigi’s tutorial. I am very happy with how this collar turned out. Awhile ago I modified the collar stand at center front so it angles straight from the button placket edge to the collar edge. I think I’m ready to return to the traditional curve. And maybe I’ll start putting buttons and buttonholes on the collar band again.

I do think I need to add a curve to the long edge of the collar, the edge that rests on my shoulders. Before cutting out this one, I did trim it a bit. I don't think it should have the folds like you see here. I like the height of the collar at center front, so adding more curve is the next thing to try, I think.

IMG_9759

I’m not sure that these buttons were the ideal match, but I had them on hand. Also, JoAnn Fabrics is my only local option for buttons and their selection is so dismal that I wasn’t hopeful about finding something better (Aisles and aisles and aisles of beads, but buttons? Who needs those?!?). Sigh.

IMG_9761

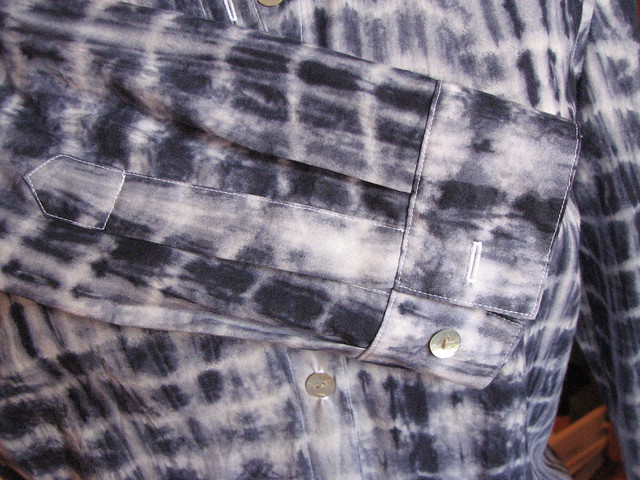
The sleeve placket and cuff went together without any issues. For a neat finish, I used French seams for the side and sleeve seams and finished the lower edge with a narrow double-turned hem.

Like I said earlier – not a surprise, but definitely a success. Now, onward with more fall sewing!

Comments

  1. Beautiful blouse, your sewing is perfect.

    ReplyDelete
  2. Love that fabric, and it is a perfect pairing with that pattern. Looks very sharp with the white pants!

    ReplyDelete
  3. They do have a sad little selection for buttons, don't they? Sigh.

    The shirt looks fantastic and your stitching is really beautiful!

    ReplyDelete

Post a Comment

Popular posts from this blog

Grocery Bags

More gifts! These are just like the still-all-too-ubiquitous plastic grocery bags, but they're fabric.  I followed this tutorial and you actually use a plastic bag as a pattern.  The instructions are very good and include a pocket so that the bag can be folded up and is easy to keep in a purse or a car's glove box. Mostly for the sake of the gift recipients, here's how to fold up the bag.... 1.  Lay the bag pocket side down and fold it length-wise using the edges of the pocket as a guide. 2.  Fold it in half, aligning the top of the handles with the bottom of the bag. 3.  Fold in half again and then reach into pocket with your hand and turn the whole thing (pocket included) inside out. Happy shopping!

Shopping Bags

Most stores in our town charge you a nickel for a plastic bag when you check out. I love this practice and the way that it encourages people to bring their own cloth bags or reuse their plastic ones. My habit of bringing along bags to the grocery store is well established, but I used to find myself stuck at places like the drug store or farmer's market or other impromptu stops. Then I picked up a bag at an upscale kitchen goods store that rolls up quite compactly. Now I keep that in my purse, so I always have a bag with me. I like my bag so much that I wanted to replicate it for the art sale. The final result is a hybrid of the bag I purchased and these that I made last year. The bag is a little bigger than the average plastic grocery bag. The velcro tab is used to keep the bag rolled up, but also can close the top of the bag when it is full. Most of the bag is a single layer of cotton, but the handles are faced. There is a double row of top-stitching around both edges of

The Burda Skirt Again

I'm not sure what prompted it, but awhile ago I decided that I needed a green skirt. The last time I was at Fabricland I saw this green wide-wale corduroy. I wasn't really looking for the skirt to be corduroy and the color was a little different than I was hoping for, but since I had my eyes peeled for awhile and hadn't seen anything better, I thought I'd try the corduroy. After looking for a suitable pattern, I settled on the Burda 2/2010 skirt that I've already used three times . Because of the weight and bulk of the corduroy, I didn't want to try to mess with too many details. I'll use another skirt pattern soon. Really, I will. One of the things I really like about this pattern is the pockets. This time I made the pocket facings and part of the pocket bag out of a cotton woven solid to reduce bulk. Since I'll be wearing this skirt with tights I added a lining. Adding the lining was really simple except that I cut the lining exactly the sam