I tend to get my back up when I feel like I am forced to make a bad choice. Like I don't have any good options, but I still have to pick one. Hate that. It happens in all different parts of life, some easier to deal with than others. One of the places it happens quite a bit for many people is with clothing. Depending on availability and geographic location, options may be quite limited. There's not much choice to be had on price point, origin, style, fit, color, etc. I love it when I feel like I can use my sewing skills to subvert that. When I finish a project and want to point my finger and yell "Ha!" like I'm stickin'-it-to-the-man, I feel ultra successful.
Such is the case with these denim shorts. My summer wardrobe was in need of another pair of shorts and I knew denim would work well. An attempt to buy a ready-to-wear pair turned out to be a waste of time and a somewhat demoralizing experience. Why did I even bother with that when I have a tried-and-true pattern in my stash? I thought I was short on time and I had only used the pattern with stretch fabrics. I knew I didn't have any stretch denim. The summer was nearly over when I started these, so I figured I'd try out the pattern with a non-stretch denim remnant that I had in stash (leftover from this skirt). A data collecting project, if you will. If it worked - great, I'd have a new pair of shorts. If it didn't work - not much of value was lost and I would have learned more about the pattern and fit.
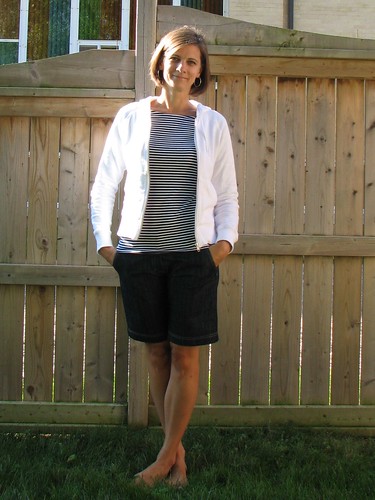
Hooray! It worked! I really like the lack of stretch. I used the exact same pattern as I did for these shorts. The khaki twill does stretch out quite a bit while wearing. They are still wearable, but they fit differently at the end of the day than they do when I first put them on. I think there is too much stretch in that fabric.
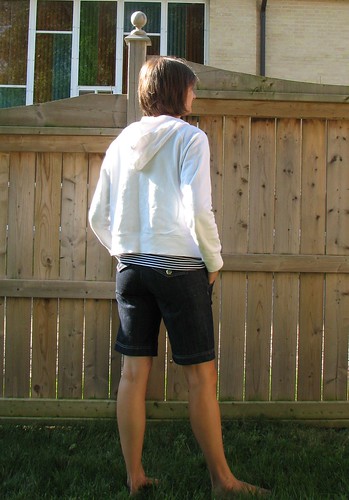
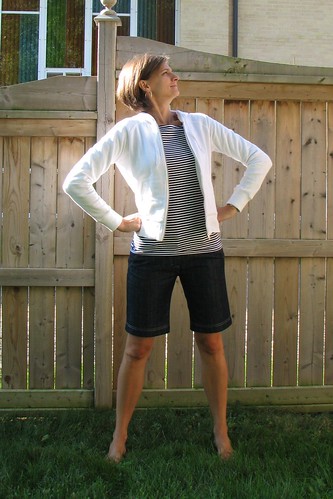
These stretch a wee bit with wear, just like traditional jeans do, but the fit remains the same. No droopy seat or slouchy waistband. I don't have much new to say about them since they're the same pattern as these pants and these shorts.

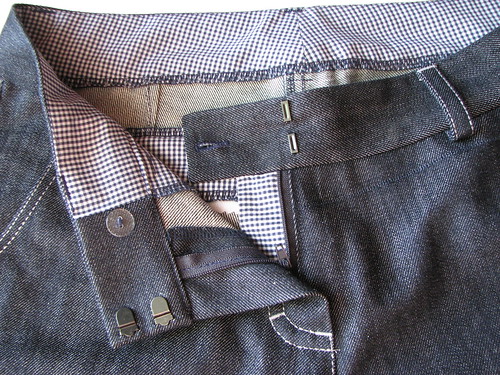
The topstitching was done with the triple straight stitch and a medium gray thread. A lightweight poly-cotton gingham lines the waistband and pockets.
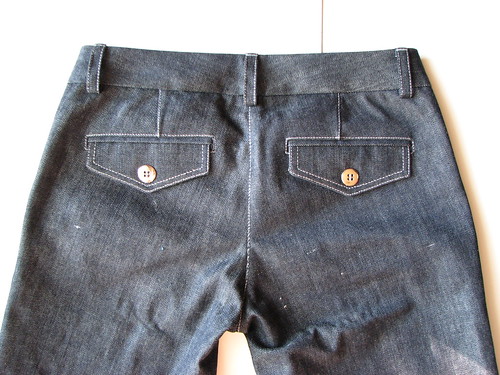
There are a couple of flaws in the fabric across the back. They stand out here more than they do in real life because of the light. I did know the flaws were there, but couldn't work around it. I used all the fabric I had left. Since it was initially just a data collecting project, I didn't worry about it too much.
There is a bit of pulling and poofing between the waistband and the crotch. It isn't significant, but I might work on tweaking that before I use the pattern again. I think the waistband is too small for the front pieces, but I haven't thought much about how exactly to fix it.
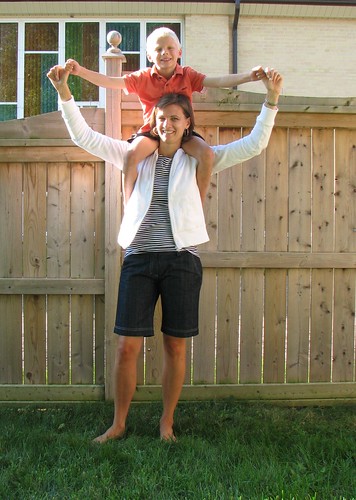
So, this is me, feeling subversive...thwarting mall trends and sizing standards...stickin' it to the man...as much like a superhero as I'll ever be...
Such is the case with these denim shorts. My summer wardrobe was in need of another pair of shorts and I knew denim would work well. An attempt to buy a ready-to-wear pair turned out to be a waste of time and a somewhat demoralizing experience. Why did I even bother with that when I have a tried-and-true pattern in my stash? I thought I was short on time and I had only used the pattern with stretch fabrics. I knew I didn't have any stretch denim. The summer was nearly over when I started these, so I figured I'd try out the pattern with a non-stretch denim remnant that I had in stash (leftover from this skirt). A data collecting project, if you will. If it worked - great, I'd have a new pair of shorts. If it didn't work - not much of value was lost and I would have learned more about the pattern and fit.
These stretch a wee bit with wear, just like traditional jeans do, but the fit remains the same. No droopy seat or slouchy waistband. I don't have much new to say about them since they're the same pattern as these pants and these shorts.
There are a couple of flaws in the fabric across the back. They stand out here more than they do in real life because of the light. I did know the flaws were there, but couldn't work around it. I used all the fabric I had left. Since it was initially just a data collecting project, I didn't worry about it too much.
There is a bit of pulling and poofing between the waistband and the crotch. It isn't significant, but I might work on tweaking that before I use the pattern again. I think the waistband is too small for the front pieces, but I haven't thought much about how exactly to fix it.
So, this is me, feeling subversive...thwarting mall trends and sizing standards...stickin' it to the man...as much like a superhero as I'll ever be...
Great looking shorts, great fit. Successful data gathering! I couldn't find in your post or the post you linked to which pattern you used. (By the way, love the denims skirt with the diagonal top stitching!)
ReplyDeleteThanks! The pattern is one I made by copying a RTW pair of pants as described in this post:
Deletehttp://mysewingspace-renee.blogspot.ca/2012/05/white-denim-trousers.html
Great basic! These are cute shorts. The fit looks good and the construction details are spot on.
ReplyDelete