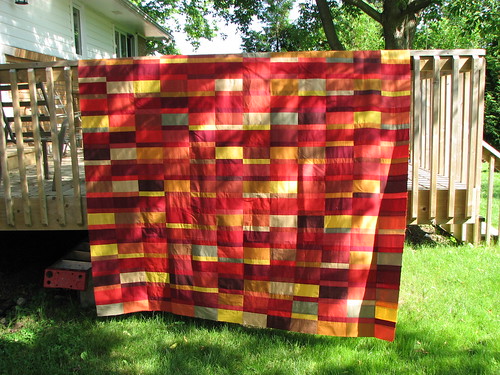
The top of the quilt is complete!
I still can't get over the size of it. You'd think I'd never seen a queen-sized blanket before. I have. I've just never made one.
My excitement level over this quilt has varied a bit. I was pretty excited with the pile of fabrics before I started. Assembling the blocks was enjoyable and soothing (straight seams, lots of pressing, well-behaved cotton, etc). When I started arranging the blocks to determine the layout, I wasn't happy with the look. That was disappointing.
The pattern for the quilt has the rectangles arranged vertically, while the quilt that I was inspired by (see previous post) has them horizontally. I initially planned to follow the pattern since it was the colors and "feel" of the inspiration quilt I was after. But, after being unhappy with it, I recalculated and switched them to vertical.
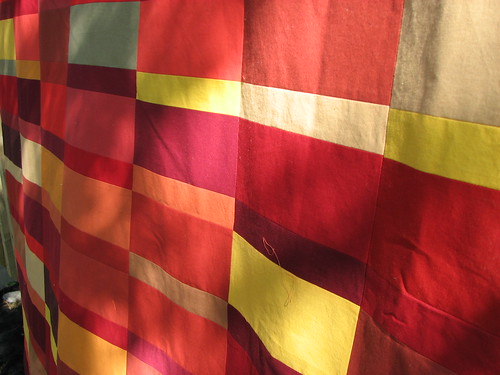
That was an improvement and my excitement rose again when I got some distance from it. Literally. Viewing it from 10-15 feet away made me like it more. The colors blended more for an overall pattern rather than a real patchwork look.
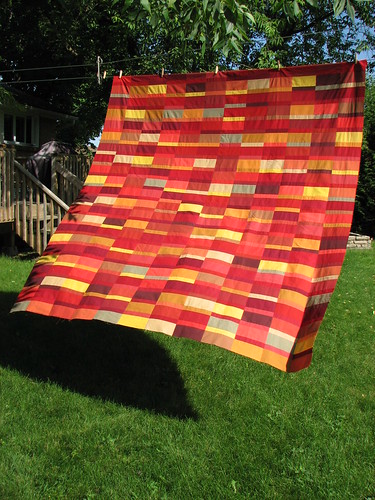
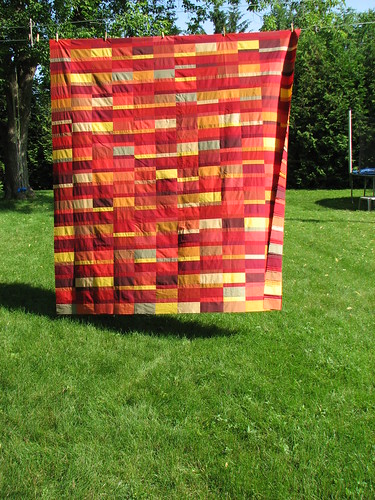
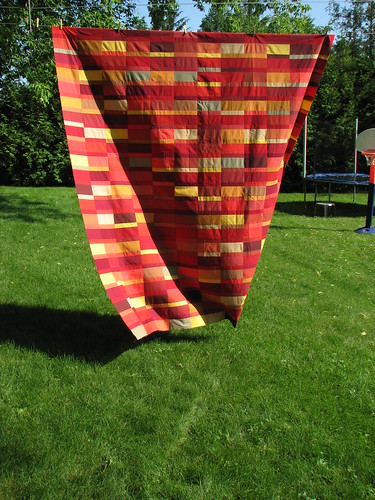
And, as you can see from all the pictures, I really liked watching it blow in the breeze on the clothesline in the sunshine. Sunshine makes everything look better. I'm hoping to rent some time on a long-arm quilting machine next week to quilt it. Both nervous and excited about that. I'll keep you posted.
*Term used by some quilters for the finished quilt top.
Pardon that stray string.
My excitement level over this quilt has varied a bit. I was pretty excited with the pile of fabrics before I started. Assembling the blocks was enjoyable and soothing (straight seams, lots of pressing, well-behaved cotton, etc). When I started arranging the blocks to determine the layout, I wasn't happy with the look. That was disappointing.
The pattern for the quilt has the rectangles arranged vertically, while the quilt that I was inspired by (see previous post) has them horizontally. I initially planned to follow the pattern since it was the colors and "feel" of the inspiration quilt I was after. But, after being unhappy with it, I recalculated and switched them to vertical.
And, as you can see from all the pictures, I really liked watching it blow in the breeze on the clothesline in the sunshine. Sunshine makes everything look better. I'm hoping to rent some time on a long-arm quilting machine next week to quilt it. Both nervous and excited about that. I'll keep you posted.
*Term used by some quilters for the finished quilt top.
Really gorgeous - can't wait to see the finished quilt!
ReplyDeletelooks just like the picture. i can't believe you have it pieced already.
ReplyDeleteare you going to get to use the long arm yourself?
Gorgeous quilt.
ReplyDeleteLooking good! So much stitching! Wow! Hope the quilting part goes smoothly for you.
ReplyDeleteCorinne says "I love the colours in your new quilt. They make me think of fruit!"
ReplyDeleteand I say "Awesome!"
It is gorgeous! You did an amazing job on this quilt. Have fun using the long arm machine. They look like a pretty fun machine :))
ReplyDeleteOh, I just love these gorgeous colours!
ReplyDeleteWhile your design has much more reds and purples, for some reason I saw this and thought of the infamous Doctor Who scarf:
ReplyDeletehttp://3.bp.blogspot.com/-IUdbr2UwLeg/UAlfDP8MfnI/AAAAAAAACzQ/ggzyD0Pwrxo/s1600/DoctorWhoScarf2.jpg