Most of the summer clothes I've sewn for myself in the last couple of years have been dresses and skirts. I wear dresses and skirts more than shorts or pants, so that's been working out well, but there are times where shorts really are a better choice. And I don't know about you, but I find it even harder to locate shorts worth buying than pants. So, my delight with the success of these pants was compounded when I realized that the pattern would also work really well for shorts.
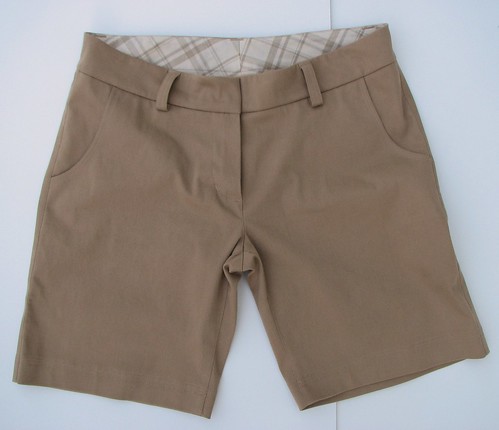
When I made my son these pants, I was really impressed with the fabric and almost regretted not saving it for myself (but I'm trying hard not to do that "saving the fabric" thing). Turns out, the remaining remnant was enough for a pair of shorts for me. The stretch twill has a really nice brushed surface and from my son's pants I know that it washes and wears well.
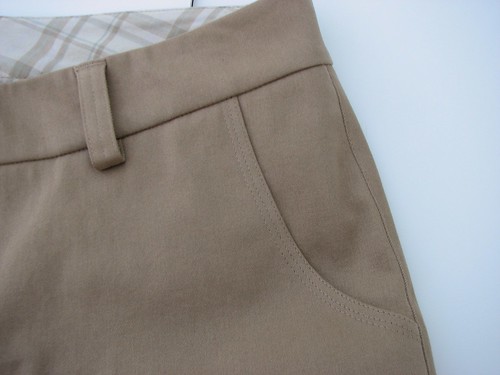
I did some triple topstitching on these also, just like his pants. Other than here on the front pockets, it is also on the welt pocket flaps and the hems.
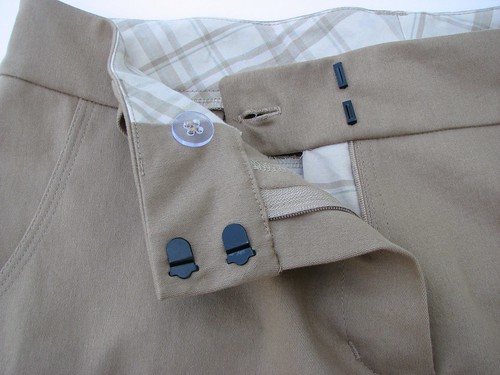
I used a neutral plaid for the interior waistband. It's cut on the bias, but it's a curved piece so it doesn't end up on the true bias at the center back. Waistband closures include hooks and eyes and a button. Peter just had a great post about installing these hooks and eyes.
Finally, there are the welts and flaps on the back - no pockets. I adjusted the darts so they are parallel to the CB seam and perpendicular to the welts.

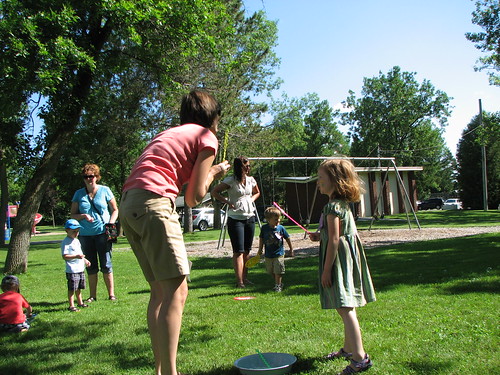
Even though there are some fussy bits on these (fly, welts, waistband) they came together pretty quickly. Being quite confident they would fit means a lot less time trying on and adjusting. Love having a pattern that just works! Here I am wearing them to blow bubbles with my daughter at her preschool graduation picnic. She's wearing another hand-me-down blogged about here.
I did some triple topstitching on these also, just like his pants. Other than here on the front pockets, it is also on the welt pocket flaps and the hems.
I used a neutral plaid for the interior waistband. It's cut on the bias, but it's a curved piece so it doesn't end up on the true bias at the center back. Waistband closures include hooks and eyes and a button. Peter just had a great post about installing these hooks and eyes.
Finally, there are the welts and flaps on the back - no pockets. I adjusted the darts so they are parallel to the CB seam and perpendicular to the welts.
Perfection! They fit perfectly and look great on you, your attention to detail is AMAZING! Thanks for the close-up pics, really appreciate it. You inspired me to finaly start working on my own pants that have been sitting in the corner for weeks. Nice job!
ReplyDeleteThey look great! Your sewing is so neat and clean.
ReplyDeleteThe shorts look wonderful!
ReplyDeleteYour sewing is impeccable on these. Great looking shorts!
ReplyDeleteWhat pattern do you use??
ReplyDelete