This past summer I really increased my summer dress selection. My fall/winter dress choices are pretty minimal, but I think I'd like to change that this year. I associate fall/winter dresses with being cold, so I'm hoping to find dress options that have long sleeves, work well for layering, or can be made in warm fabrics.
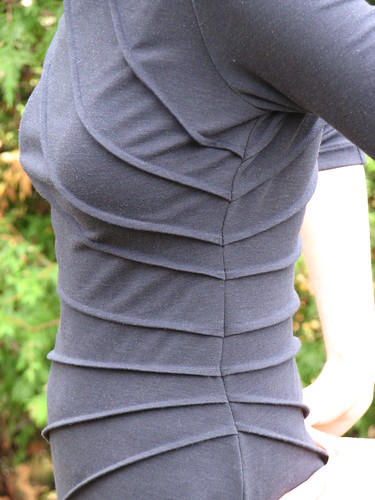
I started this add-more-dresses project with a dress to wear to a wedding I attended last weekend. While out snoop shopping a few weeks ago, I tried on a ponte knit sheath dress with tucks radiating from the side seam. It cost $250. Even though everything about the dress was too short (bodice length, skirt length, sleeve length), it was a flattering style and was easy to wear.

It was very similar to Butterick 5559. I picked up the pattern and some navy ponte knit fabric and got to work on my own version.
This was a very interesting pattern to sew. There are separate top and bottom pieces for the front and back - the seam is hidden under the tuck at the waistline. Darts shape the top and bottom pieces - they are hidden under tucks also. This is what the front bodice piece looked like after marking and before sewing:
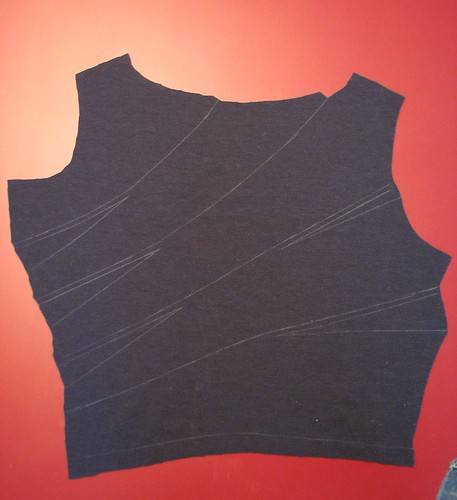
The markings are on the wrong side of the fabric. The tucks are made from the right side so I basted along the fold lines so they would be visible. Putting in all the darts and tucks took awhile, but once that was done, construction was easy-peasy.
Given my snoop shopping experience, I was concerned that this dress would also be too short. It was hard to even tell how long the piece would be after all the tucks were made. Adding length without distorting the tucks seemed difficult, but in the end I decided to add 3/8" above and below the waistline tuck. I also added 3" in skirt length below the tucks (I didn't need it all, but I don't remember how much I trimmed off) and made the sleeves 3/4 length. I cut generous side seam allowances on the skirt pieces.

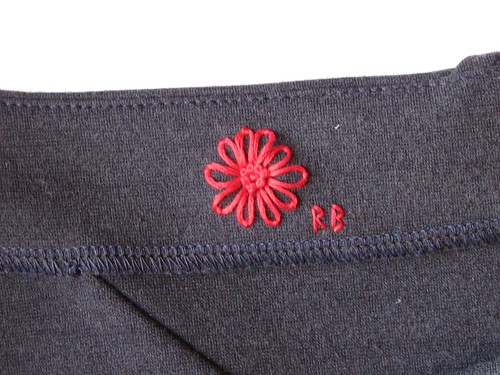
Despite trimming, grading, clipping, understitching and pressing, the facings did not want to stay turned to the inside. So, they are tacked down. Because of the boat neck and lack of other differences front to back, I have a really hard time telling which side is the front of the dress! I added a small embroidered flower and my initials to the back facing as a tag stand-in.
Also because of the wide neck, I added lingerie guards. I'm a big fan of these since putting them in this dress. It is good to not be fussing with bra straps.

I started this add-more-dresses project with a dress to wear to a wedding I attended last weekend. While out snoop shopping a few weeks ago, I tried on a ponte knit sheath dress with tucks radiating from the side seam. It cost $250. Even though everything about the dress was too short (bodice length, skirt length, sleeve length), it was a flattering style and was easy to wear.
It was very similar to Butterick 5559. I picked up the pattern and some navy ponte knit fabric and got to work on my own version.
This was a very interesting pattern to sew. There are separate top and bottom pieces for the front and back - the seam is hidden under the tuck at the waistline. Darts shape the top and bottom pieces - they are hidden under tucks also. This is what the front bodice piece looked like after marking and before sewing:
Given my snoop shopping experience, I was concerned that this dress would also be too short. It was hard to even tell how long the piece would be after all the tucks were made. Adding length without distorting the tucks seemed difficult, but in the end I decided to add 3/8" above and below the waistline tuck. I also added 3" in skirt length below the tucks (I didn't need it all, but I don't remember how much I trimmed off) and made the sleeves 3/4 length. I cut generous side seam allowances on the skirt pieces.
Also because of the wide neck, I added lingerie guards. I'm a big fan of these since putting them in this dress. It is good to not be fussing with bra straps.
I'm happy with the end result. And The Preacher liked it, too. Bonus!
Wow! You look fabulous in this dress and your construction looks flawless.
ReplyDeleteI agree with Shannon, you look fabulous, perfect sewing on this dress. Fantastic job.
ReplyDeleteWow, this is so beautiful, I'm lost for words here.
ReplyDeleteI echo the other comments, you look great in this dress and the stitching is great!
ReplyDeleteSame for me...I think you look amazing in this dress and the construction looks perfect :)
ReplyDeleteI love it. You look wonderful. Great job.
ReplyDeleteWhat a lovely dress!
ReplyDeleteBeautiful! I am especially impressed with how well your tucks matched up on the sides. Nice work!
ReplyDelete