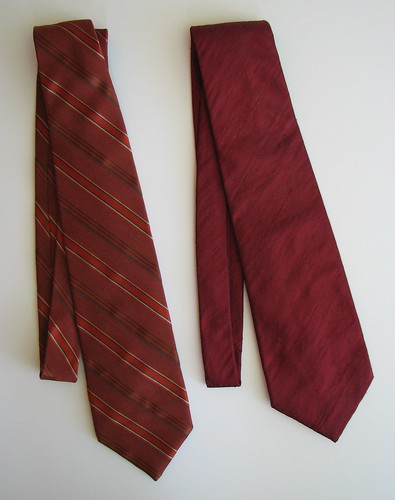
The local fair has recently come and gone. As I have done in years past, I entered some sewn things for judging. There was a distinct lack of sewing time in the weeks before the fair, but I came up with six things that I could finish easily before the fair or things that I had made over the last year and were eligible. All of the six things placed in the top three in their category. A couple of things haven't made it on the blog yet. One of those is a necktie for The Preacher.
Back in the spring, I bought some necktie silk in NY. I didn't have a clue about making ties, but I thought it might be a fun thing to try. Most of the big pattern companies have some sort of tie pattern, but I wasn't expecting that would be the best source for instructions and guidance. Some online research led me to David Page Coffin's Custom Making Neckties at Home.
There is a lot of information included in the 17-page booklet and I found it really helpful. Coffin clearly is experienced and knowledgeable. This was the only source I used and it included everything I needed to know. But, I think that the booklet would benefit from some reorganizing and editing. Paragraphs are long, white space is minimal and I found myself flipping back and forth through pages trying to connect different parts on my own. I found his Shirtmaking book similar - lots of great info, but strangely organized.
All you need for a tie is outer fabric, lining and interfacing. Using the right kind of interfacing is pretty important. Rather than trying to find something suitable in yardage, I took apart one of The Preacher's old ties that he liked the length and width of. I used it to make a pattern for the new tie following Coffin's instructions.
The red dupioni tie was my first try. It looks okay from the front, but the back is awful. The most difficult part of the tie-making process is attaching the lining to the blade so that it is set back from the edge about 1/4". Coffin gives pretty detailed instructions for how to do this by machine. I followed them quite carefully, but mine came out very uneven.
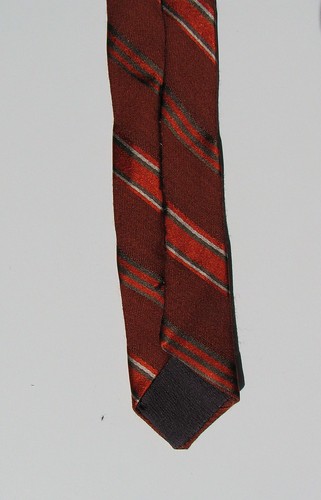
The process is repeated on the tip end of the tie, so I did practice it twice and then cut into the good tie fabric. Finishing the tip end went better than the red one and the blade end went better yet. Certainly, there is still room for improvement, but compared to my first attempt, this is beautiful.
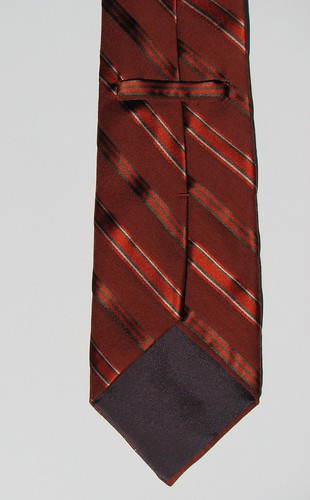
There is a loop for slipping the tail end through and a bar tack where the slipstitching begins. From the bar tack toward the tail, the tie is slipstitched closed. The trick is to keep the front smooth and even around the interfacing - not pulling too tight and not leaving it too loose. Either will cause problems when the tie is tied around the neck. Since the whole thing is on the bias, this takes some patience and finesse.
The underside of the tie's tail end is pretty sad and ugly. I'm not sure what happened, but those edges just barely met when they should have overlapped. So, I did the best I could to just keep them together.
In the end, the tie is wearable and The Preacher likes it. And it won first prize at the fair! I thought it might be the only one in its category, but there was another one entered. But, I don't need to make any more ties. It was a challenge and it's good to try something new, but it wasn't a lot of fun. And sewing should be fun!
Back in the spring, I bought some necktie silk in NY. I didn't have a clue about making ties, but I thought it might be a fun thing to try. Most of the big pattern companies have some sort of tie pattern, but I wasn't expecting that would be the best source for instructions and guidance. Some online research led me to David Page Coffin's Custom Making Neckties at Home.
There is a lot of information included in the 17-page booklet and I found it really helpful. Coffin clearly is experienced and knowledgeable. This was the only source I used and it included everything I needed to know. But, I think that the booklet would benefit from some reorganizing and editing. Paragraphs are long, white space is minimal and I found myself flipping back and forth through pages trying to connect different parts on my own. I found his Shirtmaking book similar - lots of great info, but strangely organized.
All you need for a tie is outer fabric, lining and interfacing. Using the right kind of interfacing is pretty important. Rather than trying to find something suitable in yardage, I took apart one of The Preacher's old ties that he liked the length and width of. I used it to make a pattern for the new tie following Coffin's instructions.
The red dupioni tie was my first try. It looks okay from the front, but the back is awful. The most difficult part of the tie-making process is attaching the lining to the blade so that it is set back from the edge about 1/4". Coffin gives pretty detailed instructions for how to do this by machine. I followed them quite carefully, but mine came out very uneven.
There is a loop for slipping the tail end through and a bar tack where the slipstitching begins. From the bar tack toward the tail, the tie is slipstitched closed. The trick is to keep the front smooth and even around the interfacing - not pulling too tight and not leaving it too loose. Either will cause problems when the tie is tied around the neck. Since the whole thing is on the bias, this takes some patience and finesse.
The underside of the tie's tail end is pretty sad and ugly. I'm not sure what happened, but those edges just barely met when they should have overlapped. So, I did the best I could to just keep them together.
In the end, the tie is wearable and The Preacher likes it. And it won first prize at the fair! I thought it might be the only one in its category, but there was another one entered. But, I don't need to make any more ties. It was a challenge and it's good to try something new, but it wasn't a lot of fun. And sewing should be fun!


I really like the fabric you used for the ties, I'm partial to darker reds. Congratulations on the prize. Even if it's well done, I completely agree that sewing should be fun. Just because we can do something doesn't mean we have to.
ReplyDeleteThis comment has been removed by a blog administrator.
ReplyDelete