So, about the obi mentioned here...
One side of the belt is solid navy with gingham ties and the other side is gingham with solid ties. So, it's reversible, but you get the same combination of fabrics either way.
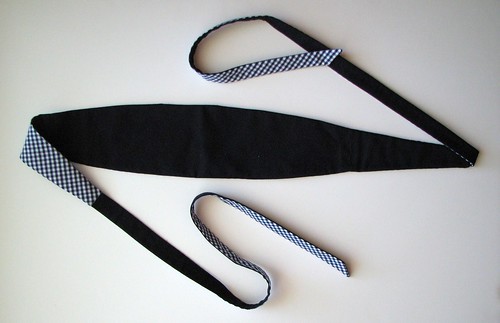
I don't have any obis and haven't worn one before, so when it came time to make the pattern, I did some guessing about size and dimensions. Finished, it is 4" high at center front, curving down to 2.5" at the side seam. The back piece tapers from 2.5" down to 1". The ties are 29" long and 1" wide.
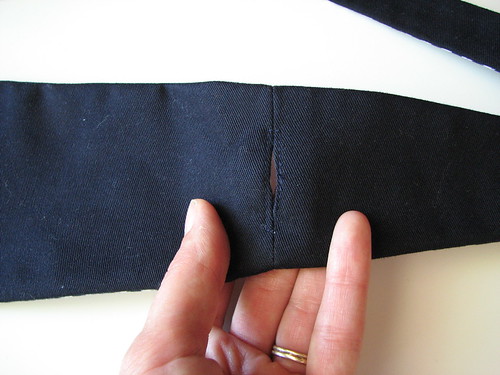
I left an opening in one side seam for the tie to go through when wrapping it back to the front.
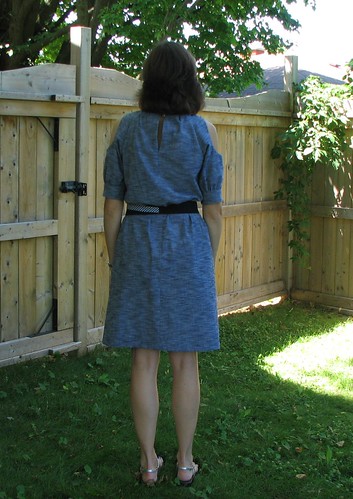
I like that this enables me to pull it snug and it stays in the right place with minimal adjusting while wearing. I find my tolerance for fussing with clothing while I'm wearing it keeps decreasing. Is that an age thing? Maybe a smartness thing. We'll go with that.
Generally, I like the contrast ties for this belt, but I think it does look a little strange from the back, where the gingham tie starts No picture of the side view, but the opposite gingham tie shows up at the side seam. I think it's pretty obvious what is going on, but it might be a little abrupt for the eye. One continuous color or fabric might be more flattering.
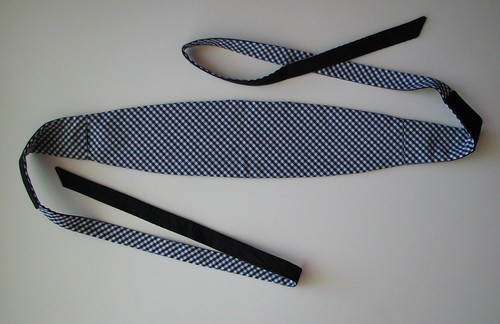
One side of the belt is solid navy with gingham ties and the other side is gingham with solid ties. So, it's reversible, but you get the same combination of fabrics either way.
I don't have any obis and haven't worn one before, so when it came time to make the pattern, I did some guessing about size and dimensions. Finished, it is 4" high at center front, curving down to 2.5" at the side seam. The back piece tapers from 2.5" down to 1". The ties are 29" long and 1" wide.
I left an opening in one side seam for the tie to go through when wrapping it back to the front.
Generally, I like the contrast ties for this belt, but I think it does look a little strange from the back, where the gingham tie starts No picture of the side view, but the opposite gingham tie shows up at the side seam. I think it's pretty obvious what is going on, but it might be a little abrupt for the eye. One continuous color or fabric might be more flattering.
I fused straight-grain interfacing to the gingham to keep it from getting stretched out. I also added a second layer of the twill fabric inside to make the whole thing sturdy. I'm happy with how it turned out. It likely won't see all that much wear, but that's okay with me.
Comments
Post a Comment