Thank you for the lovely comments about the quilt top! The quilting is complete now too, but I don't have pictures to post yet. It was a really good experience using the long arm machine and I'm so happy with how it turned out. Finishing the binding might take awhile as I don't find that quite so exciting. In the meantime, I have a few projects sewn that I haven't blogged and will try to get caught up with them.
The first two things were actually sewn several weeks ago. They are the first pieces of fabric from my NY trip that I cut into. While I really liked this plaid fabric, I didn't buy very much of it. When I decided I wanted to sew it up, I was hoping to make a paneled pencil skirt with the center panel being cut on the bias. However, when I tried to fit all the pattern pieces on the fabric, it was impossible to make it work. In the end, I made just a plain skirt using McCall's 3830.
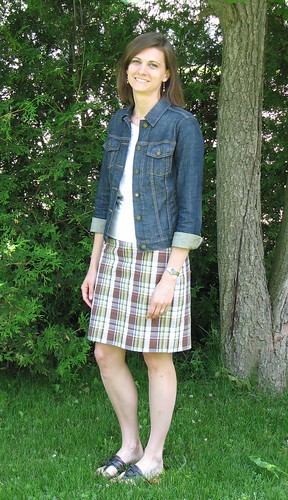
I guess I'm not unhappy with it, but not as excited about it as I was hoping. The colors look a little off in these pictures (true colors here). This is a tried-and-true pattern for me, so the fit is good and it was a very quick sew.
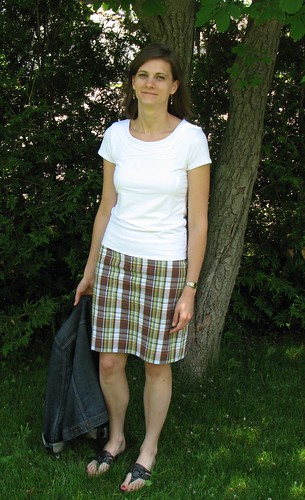
The top is also made from NY fabric. I was really happy with the feel of the fabric, but it was a little more transparent than I liked so I used Sherry's tutorial and doubled the front. Her instructions are very good. In the end, you have a doubled front and back with a fold at the hem. I'm quite happy to skip a hem and I like the clean finish.
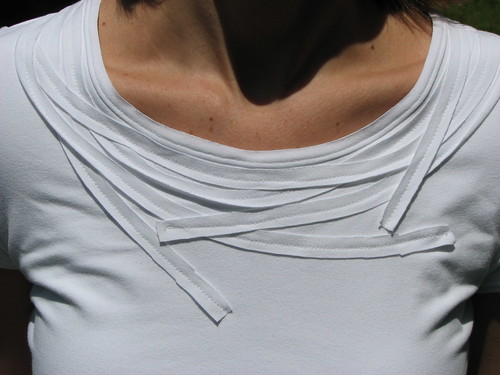
I tend to be wary of embellishments, particularly of creating them myself. But, here I was feeling brave and decided to add strips of fabric around the neckline. I give the finished result mixed reviews, but I'm telling myself that it's good to try something different. I've worn and washed the top a few times now and the strips are much more raw-looking and curled at the edges. I think it looks better now than it does in the picture here.
I used Kwik Sew 3338, one I've used a few times prior (pre-blog). I was pretty sure this was a good fitting pattern, but I don't think this white top turned out to be a good fit, particularly in the shoulder. I've had this problem with other Kwik Sew patterns and I think I just need to do a forward shoulder adjustment for them from now on. The shoulder seam sits to the back of my shoulder point and that leaves fabric in the sleeve to bunch up a bit on the back of my arm.
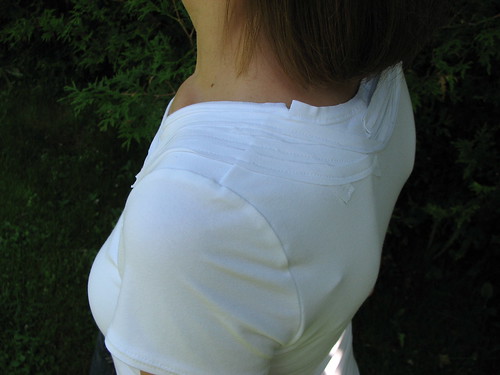
I also could have taken it in at the waist or graded out at the hips as it doesn't sit very smoothly through my mid-section. Even though I'm not that happy with the fit of this top, I've worn it a few times already, proving that it fills a hole in my wardrobe. I feel like I should replace it with something better. Maybe next summer...
The first two things were actually sewn several weeks ago. They are the first pieces of fabric from my NY trip that I cut into. While I really liked this plaid fabric, I didn't buy very much of it. When I decided I wanted to sew it up, I was hoping to make a paneled pencil skirt with the center panel being cut on the bias. However, when I tried to fit all the pattern pieces on the fabric, it was impossible to make it work. In the end, I made just a plain skirt using McCall's 3830.
The top is also made from NY fabric. I was really happy with the feel of the fabric, but it was a little more transparent than I liked so I used Sherry's tutorial and doubled the front. Her instructions are very good. In the end, you have a doubled front and back with a fold at the hem. I'm quite happy to skip a hem and I like the clean finish.
I used Kwik Sew 3338, one I've used a few times prior (pre-blog). I was pretty sure this was a good fitting pattern, but I don't think this white top turned out to be a good fit, particularly in the shoulder. I've had this problem with other Kwik Sew patterns and I think I just need to do a forward shoulder adjustment for them from now on. The shoulder seam sits to the back of my shoulder point and that leaves fabric in the sleeve to bunch up a bit on the back of my arm.
I also could have taken it in at the waist or graded out at the hips as it doesn't sit very smoothly through my mid-section. Even though I'm not that happy with the fit of this top, I've worn it a few times already, proving that it fills a hole in my wardrobe. I feel like I should replace it with something better. Maybe next summer...
I love the tee embellishment. It reminds me very much of a RTW shell I saw the other day.
ReplyDeleteThe t-shirt embellishment is fantastic. It really "goes" with the plaid skirt too. Cute outfit!
ReplyDeleteI love this outfit on you. The embellishment looks great!
ReplyDeletethe neckline strip embellishment looks terrific. I'm gonna try that one soon!
ReplyDeletei have the same problem with the shoulder seam. the solution is that you have to line up the shoulder seam with an imaginary spot on the sleeve cap about 1/4" to 1/2" BEHIND where it lines up now. i know it sounds counter-intuitive, but it's the cap that's actually pulling the shoulder askew.
ReplyDeletethe sleeve wants to go backward on that pattern and by changing the center point to match up with your real shoulder, you're pulling the sleeve forward, which in turn pulls the shirt with it. judging from the photo, in your case, i'd guess 1/2". that should get rid of the bagginess at the back of the sleeve and pull the shoulder seam forward at the same time.
have i totally confused you yet?