It feels like it has taken me awhile to get to this point, but I'm finally moving forward with my coat. This is a strange time of year to start making a winter coat, since we're so close to spring. Right? Spring is coming, isn't it? Actually, right now it is very windy and snowy outside my window and the temperature is well below freezing. Maybe it's a great time to start a winter coat. Sigh.
I mentioned this awhile ago, but the real reason I'm starting a coat now is that The Preacher and I are going to New York City at the end of March and I'm hoping to bring this coat along and have the buttonholes professionally done at Jonathan Embroidery. I haven't actually tried it, but I suspect that my machine wouldn't be very excited about doing buttonholes on a coat.
Initially, I was going to use Simplicity 2508 - specifically the view made in white on the right side of the envelope. I made a muslin to check the fit and found it to be okay, but after thinking on it for a few days, I decided that it wasn't really what I wanted. It is a beautiful coat when it is buttoned up, but the collar and double-breasted front would look odd if left open.
So, the search for a new pattern began. And it ended when I found BurdaStyle's Talea.
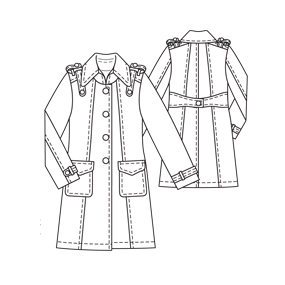 The line drawing looked interesting to me, but I was hooked when I looked at the coat made up and at all the versions people have posted on the site.

Ironically, the directions suggest using snaps as a closure. I think I'm still going to go ahead with my buttonhole plan.
The pattern is free (as long as you consider 43 pieces of paper and ink needed to print it out negligible) and other than a few oddities in the instructions, it's good. I made up a muslin and all the pieces fit together great. The sleeves practically eased themselves in. Hopefully it goes as well with the wool coating. The major drawback is that it doesn't include pattern pieces for a lining except for the sleeves. A lining seemed pretty important to me, so I drafted those pieces. That isn't something that I've done a lot of, so it took awhile for me to figure out. The cut-on front facing style seemed to make it a little more complicated for me.
I've started sewing some of the small pieces and I'll report about that soon. The further I get into the project, the more excited I am.
I mentioned this awhile ago, but the real reason I'm starting a coat now is that The Preacher and I are going to New York City at the end of March and I'm hoping to bring this coat along and have the buttonholes professionally done at Jonathan Embroidery. I haven't actually tried it, but I suspect that my machine wouldn't be very excited about doing buttonholes on a coat.
Initially, I was going to use Simplicity 2508 - specifically the view made in white on the right side of the envelope. I made a muslin to check the fit and found it to be okay, but after thinking on it for a few days, I decided that it wasn't really what I wanted. It is a beautiful coat when it is buttoned up, but the collar and double-breasted front would look odd if left open.
So, the search for a new pattern began. And it ended when I found BurdaStyle's Talea.
Ironically, the directions suggest using snaps as a closure. I think I'm still going to go ahead with my buttonhole plan.
The pattern is free (as long as you consider 43 pieces of paper and ink needed to print it out negligible) and other than a few oddities in the instructions, it's good. I made up a muslin and all the pieces fit together great. The sleeves practically eased themselves in. Hopefully it goes as well with the wool coating. The major drawback is that it doesn't include pattern pieces for a lining except for the sleeves. A lining seemed pretty important to me, so I drafted those pieces. That isn't something that I've done a lot of, so it took awhile for me to figure out. The cut-on front facing style seemed to make it a little more complicated for me.
I've started sewing some of the small pieces and I'll report about that soon. The further I get into the project, the more excited I am.
I've looked at that coat many times too - I love all the cute decorative features on it - the only thing that puts me off is the giant collar which, depending on the fabric, may or may not sit well.
ReplyDeleteI'm sure you will make a splendid job of it - even if Spring is just round the corner, I'm sure your Spring is still quite cool for a while, right? Our spring is cool for several months and then snap! it's summer.
Love the details of this pattern and I think the style will look great on you.
ReplyDeletedo you mind uploading the pattern again? Thanks!
ReplyDeleteThe pattern is at the BurdaStyle website and can be downloaded there.
Delete