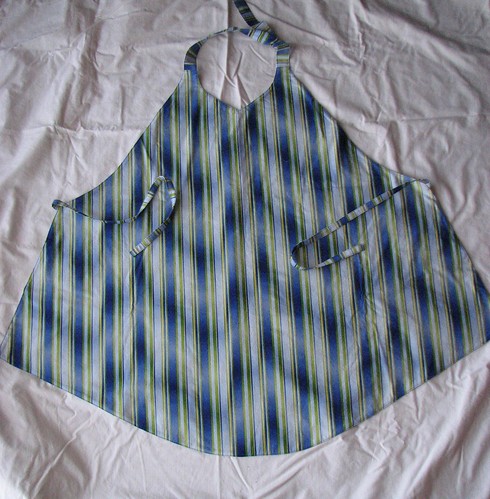
After making the changes that I mentioned here, I made another apron. This one was a belated birthday gift for my mom.
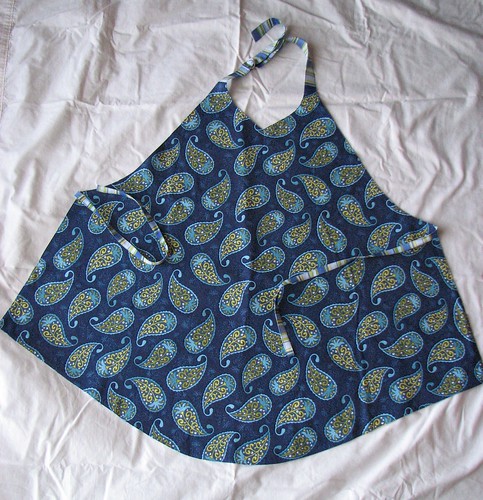
I didn’t get any pictures of it on, so it is hard to compare to the first one, but I like it better. The reverse is a blue/green/yellow stripe.
Similar to what I did for this project, I made some other kitchen goodies to go along with it.
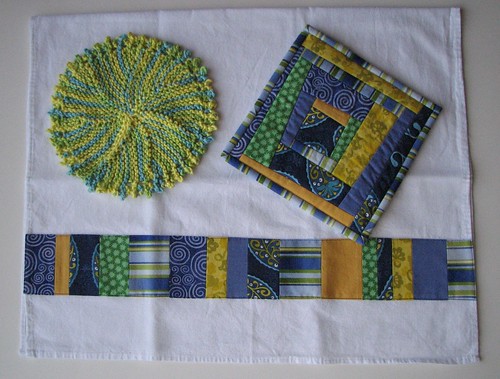
For the potholder, I used the wonky log cabin tutorial from Quilt Dad. This was a first for me. I’m pretty sure I over-wonked it because the center square should still be in the center, but mine isn’t. I’m pretty sure a large (12.5”) square quilting ruler (which I don’t have) would prevent that sort of thing.
The apron fabrics and the yellow flower print in the pot holder and tea towel were purchased at a new quilt shop in town. I’ve been there a couple of times now and I think it holds a lot of promise – a good selection of traditional and modern prints. My Christmas stocking held a gift certificate from The Preacher so I can go shopping there again soon!
I didn’t get any pictures of it on, so it is hard to compare to the first one, but I like it better. The reverse is a blue/green/yellow stripe.
Similar to what I did for this project, I made some other kitchen goodies to go along with it.
For the potholder, I used the wonky log cabin tutorial from Quilt Dad. This was a first for me. I’m pretty sure I over-wonked it because the center square should still be in the center, but mine isn’t. I’m pretty sure a large (12.5”) square quilting ruler (which I don’t have) would prevent that sort of thing.
The apron fabrics and the yellow flower print in the pot holder and tea towel were purchased at a new quilt shop in town. I’ve been there a couple of times now and I think it holds a lot of promise – a good selection of traditional and modern prints. My Christmas stocking held a gift certificate from The Preacher so I can go shopping there again soon!
I had the Homemaker ladies over for soup supper and I donned the lovely apron and used the other kitchen accessories. Lot's of compliments to pass on to you. Thanks for the gift.
ReplyDeleteAlso, well done on the 2010 goals.
Great apron, and pretty potholder! I'm sure your mom will love them!
ReplyDeleteEver since I've seen your aprons and accessories I want some too ... It is on my to do list, right after baby stuff :)
ReplyDeleteThis one looks great and so do the accessories.
I like these kinds of kitchen things.
(I bought a bread basket that is made with fabric. It is really cute. When I seen it I actually thought it was something you might sew and sell...It appears to be very simple pattern, I will take some pictures of it and post them on my blog for you.)