After last Christmas S gave me a small star pillow. She had a few of them and used them to decorate her shop for Christmas. They were not for sale, but she always had people ask if they could buy them and how much they were. So, she asked me to make some like it to sell this year.
Here's the original:
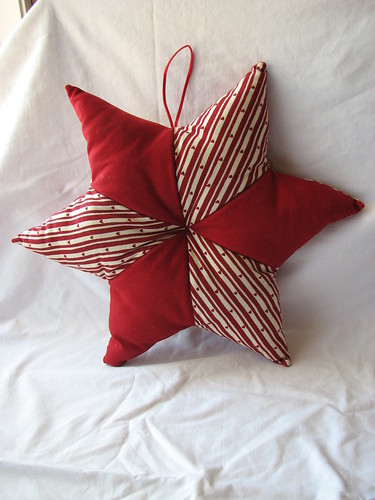
It was pretty easy to copy and fun to make. I measured one of the diamonds, drew it out on paper, and added seam allowances. Each side of the pillow is made of three diamonds each from two different fabrics.
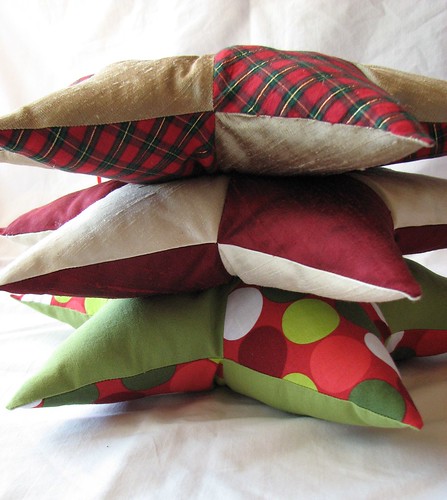
My three copies:
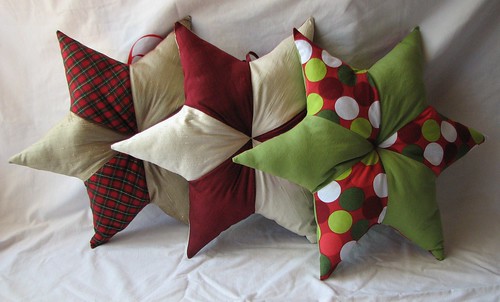
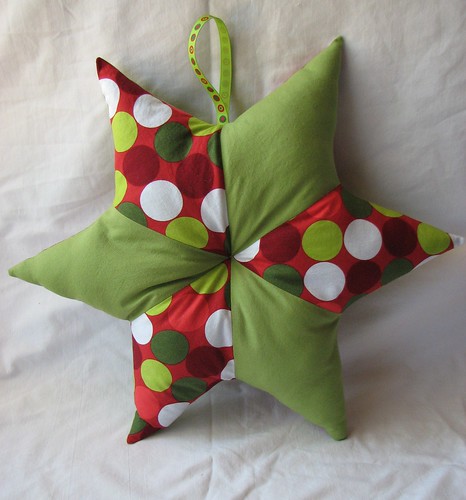
This one, my favorite, is made from two different quilting cottons.
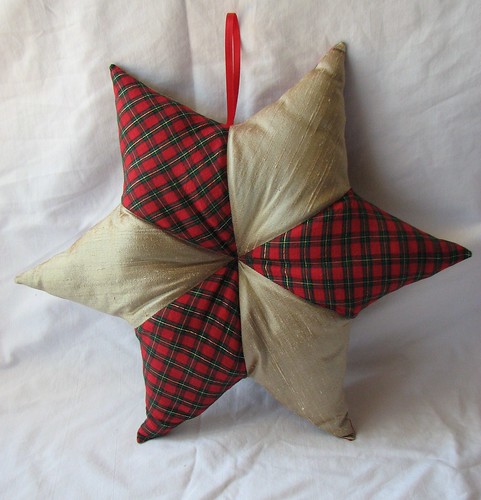
The second is a classic Christmas plaid and gold dupioni silk.
The third is burgundy and ivory, both dupioni silk.

It's hard to determine their size from the photos - they're 16" across from one point to another and 9" from one "valley" to another. Each has a ribbon loop so they can be hung if desired.
S and her co-worker were pretty excited about these. We talked about maybe making a larger one for a couch cushion. And maybe some Christmas table runners. Busy, busy, busy...
Here's the original:
It was pretty easy to copy and fun to make. I measured one of the diamonds, drew it out on paper, and added seam allowances. Each side of the pillow is made of three diamonds each from two different fabrics.
My three copies:
This one, my favorite, is made from two different quilting cottons.
The second is a classic Christmas plaid and gold dupioni silk.
The third is burgundy and ivory, both dupioni silk.
It's hard to determine their size from the photos - they're 16" across from one point to another and 9" from one "valley" to another. Each has a ribbon loop so they can be hung if desired.
S and her co-worker were pretty excited about these. We talked about maybe making a larger one for a couch cushion. And maybe some Christmas table runners. Busy, busy, busy...
Pretty! Where is the stuffing hole? You are darn good, I can't see any of them. :-)
ReplyDeleteGood job! I think the Christmas stars are adorable!
ReplyDeleteThose are very pretty. The possibilities of customizing them for a person makes this a great gift as well.
ReplyDeleteYou did a wonderful job on these, love the fabrics you picked.I think the bigger pillow would be awesome too.
ReplyDelete