I'm feeling much better today. The antibiotic is doing its job. To me it seemed that it took awhile to start being effective, but I think I was impatient after not feeling well for weeks. Yesterday I had confirmation that the medicine was indeed circulating in my body because I started having an icky metallic taste in my mouth that wouldn't go away. That is one of the side effects of the drug. It tastes like what I imagine having a dirty penny in my mouth would taste like. Blegh. But, enough about that. Let's talk sewing, shall we?
Over the summer I ordered two Oliver + S patterns - the Jumprope Dress and the Music Class Skirt and Blouse. I have admired their modern, but classic patterns with great details for awhile now and decided to work them into my fall sewing for my daughter.
First, the blouse:
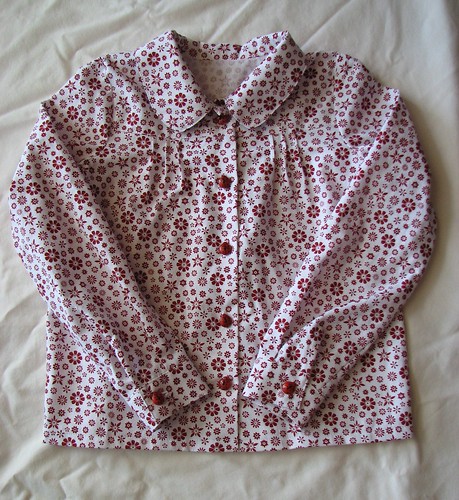
I combined the Peter Pan collar from the short-sleeve version with the rest of the long-sleeve version.
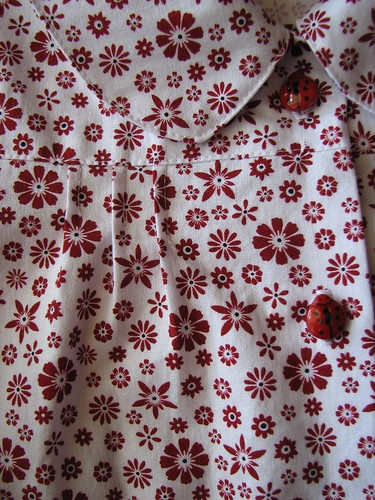
The yoke and pintucks keep it from being too plain. Unfortunately, I think we made a poor fabric choice and the details are hard to see. My daughter has admired these ladybug buttons every time she has been to the fabric store, so it was fun to be able to use them here.
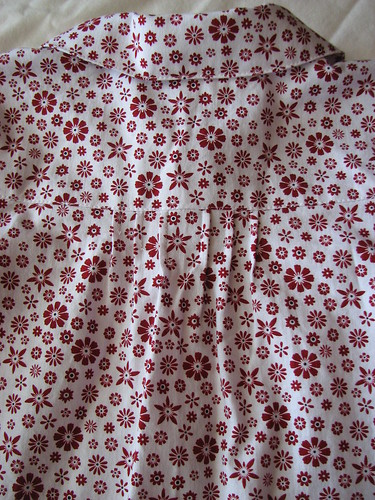
The pintucks are repeated on the back. It's hard to discern here, but in the set of three tucks, the center one is longest and they each get a little shorter as you move toward the side.
I'm pretty happy with how the blouse turned out, but I'm really excited about the skirt. I think it turned out so cute. It was quick and easy, but, again, with great details to keep it interesting.
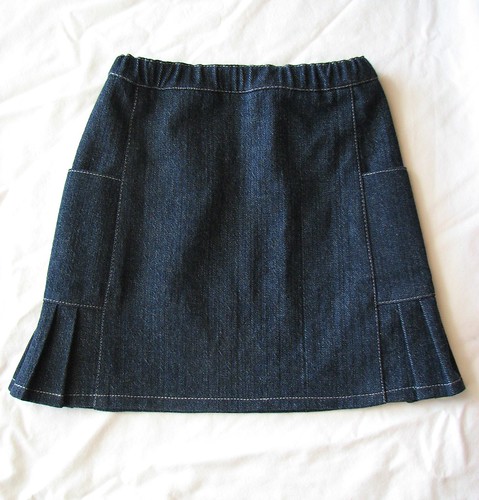
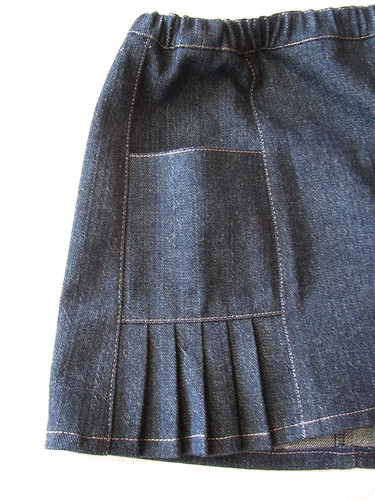
I was concerned that the denim would be too bulky for an elastic waistband, but there isn't much difference between the waist and hip measurement, so it worked okay.
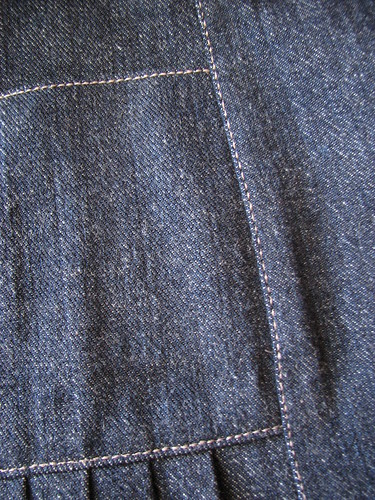
The side panels have a pocket and then a pleated inset at the bottom. The pleats pressed well in the denim and I hope they stay that way. (Does anyone else hold their breath a little bit the first time something goes through the wash?)
I used gray thread and the triple straight (stretch) stitch for topstitching and like how it turned out.
After sewing both the Music Class outfit and the Jumprope Dress (post yet to come), I can say that the directions in these patterns are fantastic. This wasn't news to me, but it was nice to see them for myself. Because of the details, these might not be the best patterns for absolute beginners, but they would be good for advanced beginners that are looking to increase their skills. The directions actually tell you how to sew the different parts - especially the difficult parts like plackets. Personally, I really appreciated the places where it said something like, "HINT: This is a tricky seam....." If I try to think like a beginner, I would find that reassuring if I was struggling to get it right. Often pattern instructions have no distinction between difficult and easy steps.
There are a lot of other Oliver + S patterns that I'd like to try (like the Sunday Brunch Jacket and the School Photo Dress). They aren't cheap patterns, but they're so cute! And I'm done thinking that patterns (and most other things, actually) should be cheap. After having tried to make some of my own I know that it takes a lot of time to get it right. The Oliver + S folks have got it right and it's worth the price.
Over the summer I ordered two Oliver + S patterns - the Jumprope Dress and the Music Class Skirt and Blouse. I have admired their modern, but classic patterns with great details for awhile now and decided to work them into my fall sewing for my daughter.
First, the blouse:

I'm pretty happy with how the blouse turned out, but I'm really excited about the skirt. I think it turned out so cute. It was quick and easy, but, again, with great details to keep it interesting.
I was concerned that the denim would be too bulky for an elastic waistband, but there isn't much difference between the waist and hip measurement, so it worked okay.
After sewing both the Music Class outfit and the Jumprope Dress (post yet to come), I can say that the directions in these patterns are fantastic. This wasn't news to me, but it was nice to see them for myself. Because of the details, these might not be the best patterns for absolute beginners, but they would be good for advanced beginners that are looking to increase their skills. The directions actually tell you how to sew the different parts - especially the difficult parts like plackets. Personally, I really appreciated the places where it said something like, "HINT: This is a tricky seam....." If I try to think like a beginner, I would find that reassuring if I was struggling to get it right. Often pattern instructions have no distinction between difficult and easy steps.
There are a lot of other Oliver + S patterns that I'd like to try (like the Sunday Brunch Jacket and the School Photo Dress). They aren't cheap patterns, but they're so cute! And I'm done thinking that patterns (and most other things, actually) should be cheap. After having tried to make some of my own I know that it takes a lot of time to get it right. The Oliver + S folks have got it right and it's worth the price.
These are so cute! I really love the O+S patterns I've sewn and agree that they are pricey, but so worth it. I particularly like that their designs are appropriate for children, but are also quite sophisticated. So much better than some of the scary stuff that they sell in the kids department. Eeek. :/
ReplyDeleteThese are absolutely so darling. Wonderful job.
ReplyDeleteOh these are really so very cute. You did an awesome job. I love the fabric and the lady bug buttons are perfect! The skirt is such a nice style. I just love everything about these two pieces.
ReplyDeleteRenee,
ReplyDeleteI've nominated you for an award on my blog and hope you accept it! I love your blog and just wanted to express my admiration in such a way. If you don't accept it I understand as well. Take Care ~
Victoria
www.tenthousandsewinghours.blogspot.com
I'm glad you're feeling better. The Oliver & S blouse and skirt are so cute. The details are wonderful. I love the pleats below the pocket on the skirt.
ReplyDelete