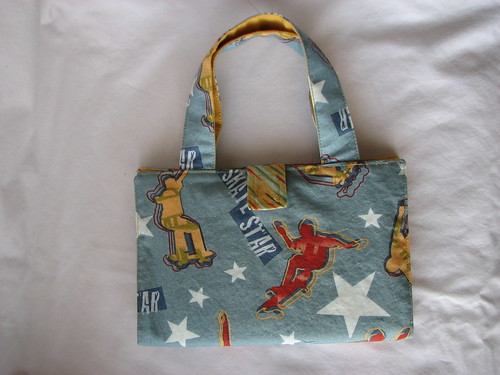
I mentioned that the little girl purses I made were well received. Compliments that came in person were usually followed up with, "I need something like that for my little boy" and S promptly requested "something for boys" for her shop. I wasn't really coming up with any good ideas, but then I remembered a little notebook thing* that my daughter received for Christmas. Made in the right fabrics it could work really well for boys. On the same Sunday I was going to explain my idea to S, she gave me a diagram with the same sort of idea sketched out. Off to the drawing board, and here's what I came up with:
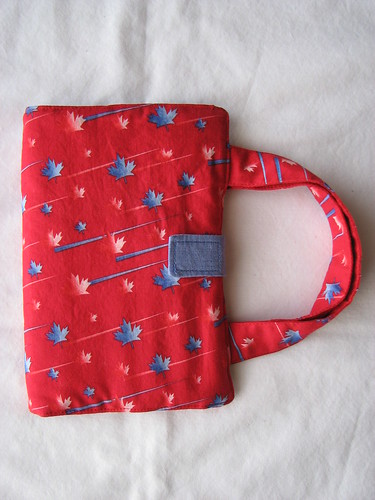
First draft:
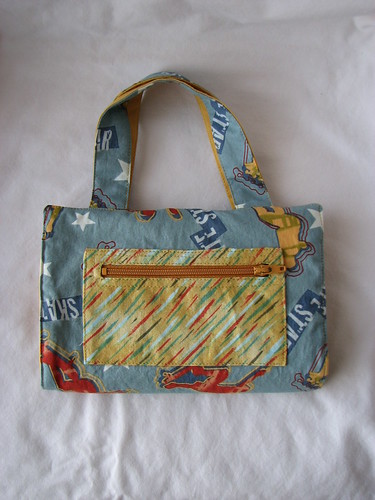
I added a zippered pocket to the back since nothing other than the pencils and pad can be carried on the inside. The pocket is small and I'm not sure what could really fit in it (a matchbox car?) but I think it adds some visual interest also.

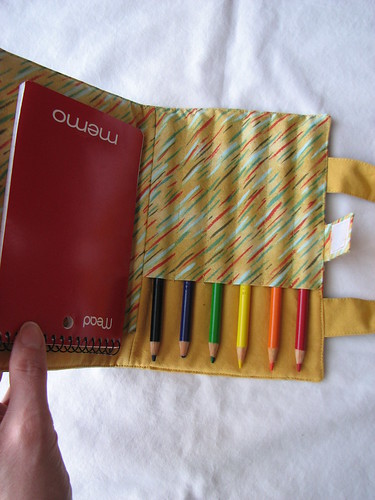
I decided to do six slots for pencils, each 7/8" wide. It is easy to get the pencils into the slots, but they fall out really easily - a rather fatal flaw. The next draft has seven 3/4" slots in the same amount of space and they hold on to the pencils much better.

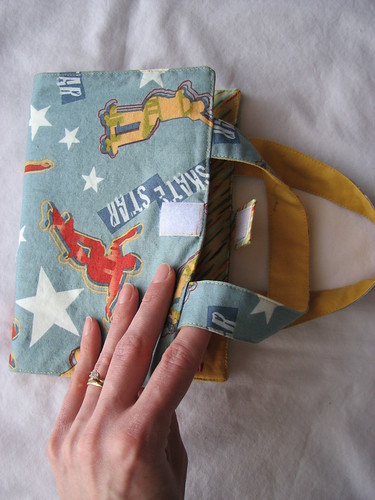
This fits a 4" x 6" notebook. I put bar tacks on either side of the notebook to keep it in place.
The roomy pencil slots is an issue with this draft, but I also put the top and bottom together backwards. When you open the "thing"* like a book, the innards are upside down.
I told my son he could have this one, but I don't think he's really going to be able to use it. The pencils falling out is really annoying. That's a bummer because he was really excited about it. I'm not sure if I'll try to adjust the slots in this one or just make a new one for him.
Second draft:
After noticing the problems with my first try, I went back, made some changes and made a second "thing"*.
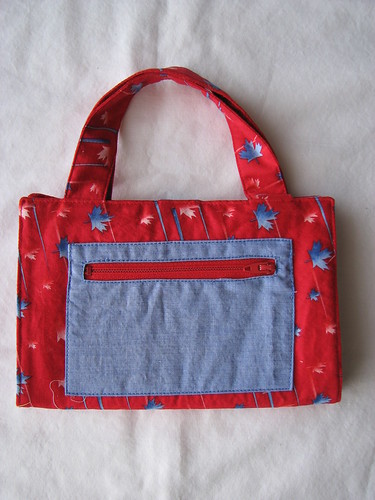
I made the pocket on the back a little larger. I'm not happy with how the zipper looks and it is by far the most tedious part of this project. I think I'll change the zipper insertion for the next one.

Here you can see the seven pencils snug in their slots. They don't fall out unless really shaken upside down.
This one is for a friend's son. I have two more cut out that I'm hoping to get to tonight.
*Can you help me come up with a name for these? It doesn't even have to be cute or marketable. I'm just not really sure what to call it. "Thing" isn't going to work for long.
First draft:
I added a zippered pocket to the back since nothing other than the pencils and pad can be carried on the inside. The pocket is small and I'm not sure what could really fit in it (a matchbox car?) but I think it adds some visual interest also.
I decided to do six slots for pencils, each 7/8" wide. It is easy to get the pencils into the slots, but they fall out really easily - a rather fatal flaw. The next draft has seven 3/4" slots in the same amount of space and they hold on to the pencils much better.
This fits a 4" x 6" notebook. I put bar tacks on either side of the notebook to keep it in place.
I told my son he could have this one, but I don't think he's really going to be able to use it. The pencils falling out is really annoying. That's a bummer because he was really excited about it. I'm not sure if I'll try to adjust the slots in this one or just make a new one for him.
Second draft:
After noticing the problems with my first try, I went back, made some changes and made a second "thing"*.
Here you can see the seven pencils snug in their slots. They don't fall out unless really shaken upside down.
This one is for a friend's son. I have two more cut out that I'm hoping to get to tonight.
*Can you help me come up with a name for these? It doesn't even have to be cute or marketable. I'm just not really sure what to call it. "Thing" isn't going to work for long.
how about "the lad bag" ? Very cute - very very cute. What a talented seamstress you are.
ReplyDeleteI like "art tool kit" or Notebook Kit
ReplyDeleteI tried to send a comment out earlier, but received an error message.
I just wanted to suggest a pocket flap secured with velcro for the sliding pencil problem and compliment you on your lovely work.
Antoinette
boys' bags
ReplyDeleteI love these color pencil and notebook holders! Boy, you are so crafty! Hope everyone helps you get the perfect name. BTW: I love the Eccl. scripture you picked--it's very inspiring:)
ReplyDeleteMy grandchildren were over last night and they could have used these! They love to color, paint & create when ever they come over. I like the idea of your case for boys!
ReplyDelete