I mentioned that my next project is a shirt for the Preacher. I'm going to use Kwik Sew 3422. This pattern has a sleeve placket that looks more like RTW than the continuous lap placket I am used to doing on button cuff sleeves. I was excited about learning this new technique, but wasn't so sure about the method they use. I remembered a Threads article about a sleeve placket, so I looked it up. It was in issue #139.
The process was pretty easy. Good instructions from Threads, as always. It requires precision to look good, but isn't complicated. One trial run was enough for me to be confident I can do it on the shirt.
I considered making up a tutorial about this, but I guess I have doubts about the ethics of making a tutorial from published and copyrighted material. But, not everyone does. A quick search turned up this tutorial - generally the same method I used.
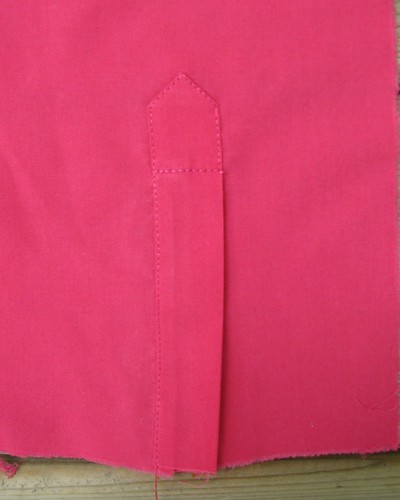 The placket looks like it is curving out to the left in the pic, but IRL it isn't.
Placket open:
The process was pretty easy. Good instructions from Threads, as always. It requires precision to look good, but isn't complicated. One trial run was enough for me to be confident I can do it on the shirt.
I considered making up a tutorial about this, but I guess I have doubts about the ethics of making a tutorial from published and copyrighted material. But, not everyone does. A quick search turned up this tutorial - generally the same method I used.
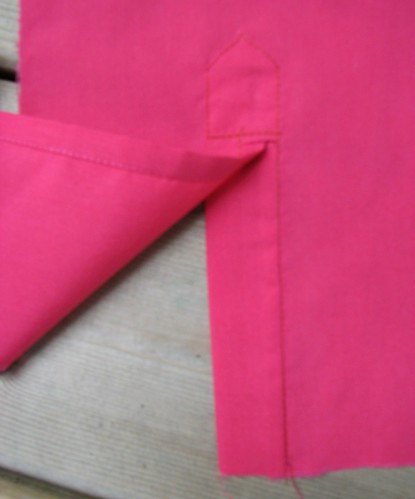
Right side, placket closed:
The placket looks like it is curving out to the left in the pic, but IRL it isn't.Placket open:
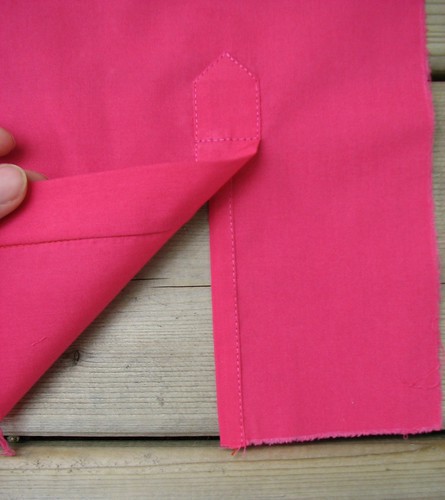 Wrong side (sorry for the blurry picture):
 This isn't the fabric I'll be using for the shirt. But wouldn't that be fun if it was...
Beautiful Placket...very well done!
ReplyDeleteThe placket tutorial you link was posted by a very well respected member of the sewing community. Mary Beth does give credit where credit is due...and just strives to make a process that some found utterly confusing, more clear.
As a professional ShirtMaker for over 20 years, I have seen countless ways to make sleeve plackets...some very different, and most just variations on a general theme.
So please, if you came up with anything that made your sewing of this classic sleeve placket easier, if you did anything a little different than the instructions that made the process easier to understand (like Mary Beth did)...please feel free to share it with the rest of us!
Thanks Pam! Mary Beth's tutorial did look very well done and clear and I hope others find it helpful. I didn't intend to sound critical of her tutorial, I just meant that I really don't fully understand what the rules are when it comes to copyrights in the blogosphere.
ReplyDeleteI followed the article instructions exactly, so nothing new for me to add. Maybe after I do a few more I'll find a trick or two.
I's say from my experience that this type of instruction is so widely available on the web that it would be hard to argue that anyone has exclusive rights to it. Now if you used the material from Threads verbatim, including the photos that's one thing, but doing a general tutorial on a widely distributed technique is something else again.
ReplyDelete