
New Look 6762 - Pink Raglan Sleeve Top

Despite the numerous bad reviews of this pattern, I still went ahead with it. The reviewers generally did not like the sleeve with darted shoulder and found the neckband to be a real problem. I like the scoop neckline and the short raglan sleeves. I thought maybe I could change the sleeve to get rid of the dart.

Off I went to check out Fit for Real People from Palmer/Pletsch. Of course they had the info I needed about removing the dart from a darted raglan sleeve. From page 176: "Today, most raglans are undarted or seamed. A darted raglan is rare." That explains why I had never seen this before. Because the dart is at the top of the shoulder, it doesn't show up on the pattern drawing for the front or the back. I don't think I would have bought the pattern if I knew about the dart. I'm pretty sure it was only $1.99, but still....
I might be starved for mental stimulation because I have quite a few knit top patterns that fit well and I like, but I still wanted to go ahead with this sleeve alteration.

I started by marking a line from the end of the dart out to the armhole seam on each side. I cut on these lines, but left a tiny "hinge" at the end of the dart.


Then I closed the dart, causing the armhole seams to get longer.

I trued the neck and armhole seam lines and traced the pattern onto a new piece.

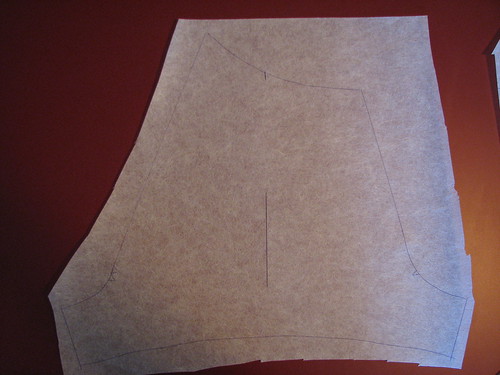
The front arm hole seam was increased by nearly 3" and the back by about 2.25". This same amount would need to be added to the front and back bodice, making this a rather loose-fitting top. That wasn't really the look I was going for, so I took a tuck across the sleeve, shortening it by 1.25".

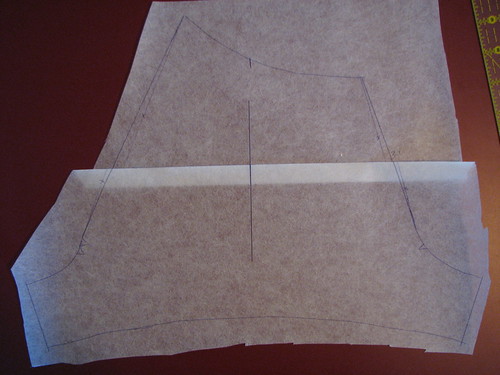
I added the new difference to the front and back bodices.

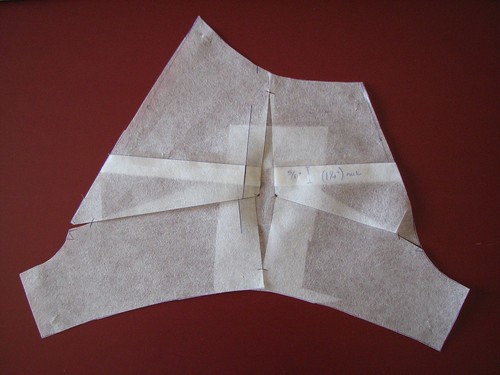
As you probably suspect, this made it hard for the sleeve to get around my shoulder. I did a muslin at this stage and there was a lot of pulling. So, I marked the end of my shoulder on the muslin while I had it on and then transferred that to the pattern piece.

From that mark, I made a vertical line to both edges of the pattern and horizontal lines to the armhole seams. I marked the seam lines and cut on either side of them, leaving them as a hinge, so as not to change the length of the seam line.

I spread the pattern at the "end of shoulder" mark. As I spread it in width, it needed to decrease in length in order to stay flat. I took the picture before I had taped everything, so it isn't flat in the pic. I added 1/2" in width.

I could have added the lost length back on at the hem, but opted not to.

So, I was hoping that would take care of the sleeve troubles with the pattern, but there was still the issue of the neckband. I didn't even look at the neckband pattern. I knew that the markings were off and as drafted, it was too wide to lay flat. So, I just made my own up.

I measured the length of the neckline minus seam allowances and figured I'd make the neckband 85% of the length. In my case, that was 24". A finished width of 1/2" sounded good, so I cut it 2.25" wide. Unfortunately, I didn't have a long enough piece of fabric left, so I had to piece the neckband. It would have been nice if the neckband seams lined up with the raglan seams, but I just wasn't up for that much math, so they don't.

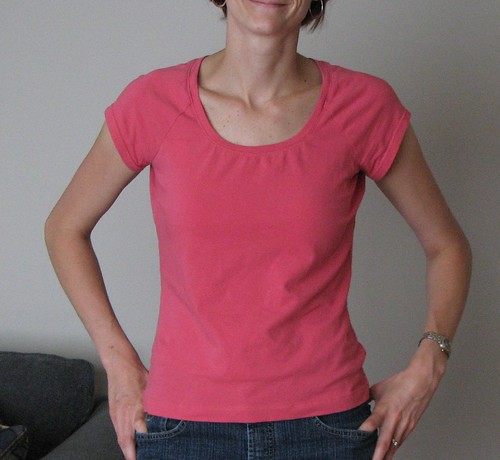
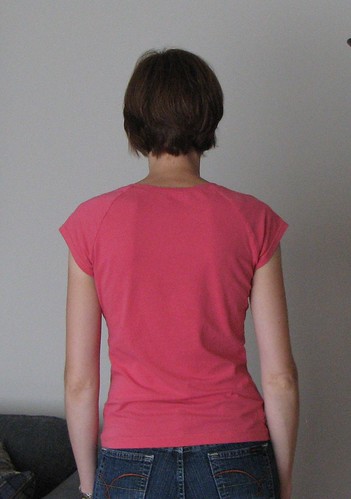
After all that, I think it's an okay shirt. Certainly not really worth all that messing around. You can see that it is a bit big under my arm (particularly on my left side in the picture) where I had to add for the increased length of the armhole.

And, the neckband should have been longer. There are some puckers on the front.


After all that, I chose to make the second top sleeveless. That post is coming soon...

Comments

  1. This is a very cute top. What a lot of work you did to get such a nice tee.
    BeccaA

    ReplyDelete
  2. This is a cute t-shirt.....you sure went through a lot of work!

    ReplyDelete

Post a Comment

Popular posts from this blog

Grocery Bags

More gifts! These are just like the still-all-too-ubiquitous plastic grocery bags, but they're fabric.  I followed this tutorial and you actually use a plastic bag as a pattern.  The instructions are very good and include a pocket so that the bag can be folded up and is easy to keep in a purse or a car's glove box. Mostly for the sake of the gift recipients, here's how to fold up the bag.... 1.  Lay the bag pocket side down and fold it length-wise using the edges of the pocket as a guide. 2.  Fold it in half, aligning the top of the handles with the bottom of the bag. 3.  Fold in half again and then reach into pocket with your hand and turn the whole thing (pocket included) inside out. Happy shopping!

Shopping Bags

Most stores in our town charge you a nickel for a plastic bag when you check out. I love this practice and the way that it encourages people to bring their own cloth bags or reuse their plastic ones. My habit of bringing along bags to the grocery store is well established, but I used to find myself stuck at places like the drug store or farmer's market or other impromptu stops. Then I picked up a bag at an upscale kitchen goods store that rolls up quite compactly. Now I keep that in my purse, so I always have a bag with me. I like my bag so much that I wanted to replicate it for the art sale. The final result is a hybrid of the bag I purchased and these that I made last year. The bag is a little bigger than the average plastic grocery bag. The velcro tab is used to keep the bag rolled up, but also can close the top of the bag when it is full. Most of the bag is a single layer of cotton, but the handles are faced. There is a double row of top-stitching around both edges of

The Burda Skirt Again

I'm not sure what prompted it, but awhile ago I decided that I needed a green skirt. The last time I was at Fabricland I saw this green wide-wale corduroy. I wasn't really looking for the skirt to be corduroy and the color was a little different than I was hoping for, but since I had my eyes peeled for awhile and hadn't seen anything better, I thought I'd try the corduroy. After looking for a suitable pattern, I settled on the Burda 2/2010 skirt that I've already used three times . Because of the weight and bulk of the corduroy, I didn't want to try to mess with too many details. I'll use another skirt pattern soon. Really, I will. One of the things I really like about this pattern is the pockets. This time I made the pocket facings and part of the pocket bag out of a cotton woven solid to reduce bulk. Since I'll be wearing this skirt with tights I added a lining. Adding the lining was really simple except that I cut the lining exactly the sam