On Tuesday evening I moaned to the Preacher that this jacket was whipping my tail. I was in over my head. He laughed and told me that was good for me. I kindly thanked him for his empathy and encouragement and soldiered on. As I got closer and closer to the finished product, I got more and more excited about it and more confident that it would be successful. That was until I tried it on a couple of days ago and my four year old (but counting down the DAYS until she is five) daughter said, "Mom, you look silly in that." Sheesh. Thanks. I can't wait for this one to become a teenager.
I did finally finish it last night. Overall, I am happy with it. I don't have any pictures of me wearing it today, just detail shots.
Buttons and Buttonholes
I bought the buttons in NY. They could be more exciting, but it is a pretty casual jacket and I think they work pretty well.
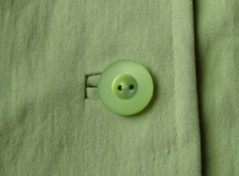 If I were doing this jacket over, I would make the bound buttonholes narrower. That would be easy to do with the method I used. Otherwise, I'm happy with the way they look on the front.
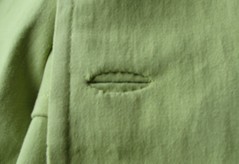
 The back is another story.... I'm not happy with how this looks. I should have made a faced window like the buttonholes and sewed that down. Now I know...
Collar and Band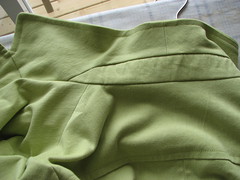 Facings and Hem
 I used a Hong Kong finish with lining fabric on the lower edge of the facing. The lining hem is finished by machine and is free hanging. The jacket hem is finished by hand. The pattern instructions say to topstitch it and I was really hung up on that for an embarrassingly long time. Once it occurred to me to finish it by hand, all the pieces came together and it was smooth sailing.
 I used French tacks to keep the lining and jacket loosely connected. This was a new technique to me and I was pleased with how mine turned out. Too bad the picture is blurry. My camera and I have had words. I'm not happy with it.
 Pictures of it on me and details about the lining and such coming soon.
I did finally finish it last night. Overall, I am happy with it. I don't have any pictures of me wearing it today, just detail shots.
Buttons and Buttonholes
I bought the buttons in NY. They could be more exciting, but it is a pretty casual jacket and I think they work pretty well.
If I were doing this jacket over, I would make the bound buttonholes narrower. That would be easy to do with the method I used. Otherwise, I'm happy with the way they look on the front. The back is another story.... I'm not happy with how this looks. I should have made a faced window like the buttonholes and sewed that down. Now I know...Collar and Band
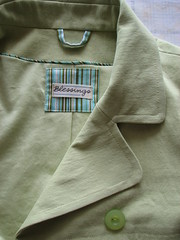
This pattern has an upper collar, under collar and band. I haven't made a jacket with the band piece before. I like it. The collar sits nicely at the back of the neck. The under collar pattern did not have a center back seam in it and I don't think it was cut on the bias. I changed both of those things.
Facings and HemThe pattern did not include a lining. It did include a front facing and instructions to cut two back yokes - one to use as a facing. I changed the back yoke into a traditional facing to make attaching the full lining easier. I added a hanging loop at the collar seam, flat piping between the facing and lining and a "tag" at center back.
I used a Hong Kong finish with lining fabric on the lower edge of the facing. The lining hem is finished by machine and is free hanging. The jacket hem is finished by hand. The pattern instructions say to topstitch it and I was really hung up on that for an embarrassingly long time. Once it occurred to me to finish it by hand, all the pieces came together and it was smooth sailing.I used French tacks to keep the lining and jacket loosely connected. This was a new technique to me and I was pleased with how mine turned out. Too bad the picture is blurry. My camera and I have had words. I'm not happy with it. Pocket Detail
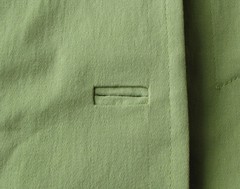
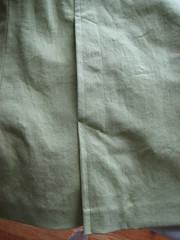
I really like the seams on the front of the jacket. The pocket is topstiched and then the pleat is below that.
Pictures of it on me and details about the lining and such coming soon.
Such a pretty jacket...your details are lovely!
ReplyDelete