Today I picked up an inexpensive washcloth to try out the soap bag in terry cloth. I don't think there is much difference in the cost of materials between this one and the knitted one, but the amount of time it takes me to make one is pretty different. This was a very quick project, yet I prefer the knitted one.
![]()
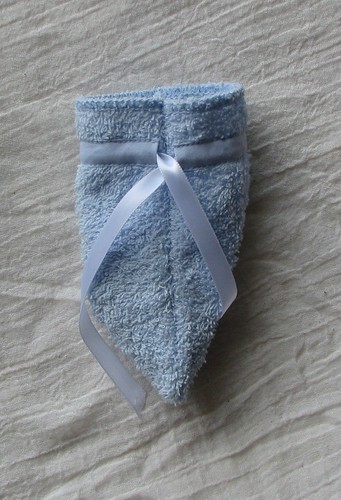
I used purchased bias tape on the outside of the bag to make the casing. This could certainly be done with a more decorative fabric or coordinating tape, but this happened to match so well I thought I would use it. It was hard for me to decide about putting the casing on the inside or the outside, but in the end I thought the outside could use a little "something" and didn't really know what else to do with it.
![]()
A plain white satin ribbon serves as the drawstring. Again, could be more decorative, but I was working with what I had. For the drawstring opening, I turned under the ends of the tape and then stitched it down before sewing the side seam. The other side is cut on the fold. As you can see in the picture, the ends don't line up exactly. More precise measuring next time....
![]()
I was hoping to bring my samples to the shop tomorrow and talk about them, but it doesn't look like it's going to work out. But, soon it will. I have one more new thing to work on for shop owner #1. Hopefully I can get started on that tomorrow.

I used purchased bias tape on the outside of the bag to make the casing. This could certainly be done with a more decorative fabric or coordinating tape, but this happened to match so well I thought I would use it. It was hard for me to decide about putting the casing on the inside or the outside, but in the end I thought the outside could use a little "something" and didn't really know what else to do with it.

A plain white satin ribbon serves as the drawstring. Again, could be more decorative, but I was working with what I had. For the drawstring opening, I turned under the ends of the tape and then stitched it down before sewing the side seam. The other side is cut on the fold. As you can see in the picture, the ends don't line up exactly. More precise measuring next time....
I was hoping to bring my samples to the shop tomorrow and talk about them, but it doesn't look like it's going to work out. But, soon it will. I have one more new thing to work on for shop owner #1. Hopefully I can get started on that tomorrow.
love this idea!
ReplyDelete